Time to Add the Magic: Marquee Now Added
This next step marks the end of a major goal of mine, to build a fully functional 4-player arcade cabinet out of LEGO® brick! And so far, it’s been an enormous amount of work. But at last, the final piece, the marquee now added!
Ordering the Screen
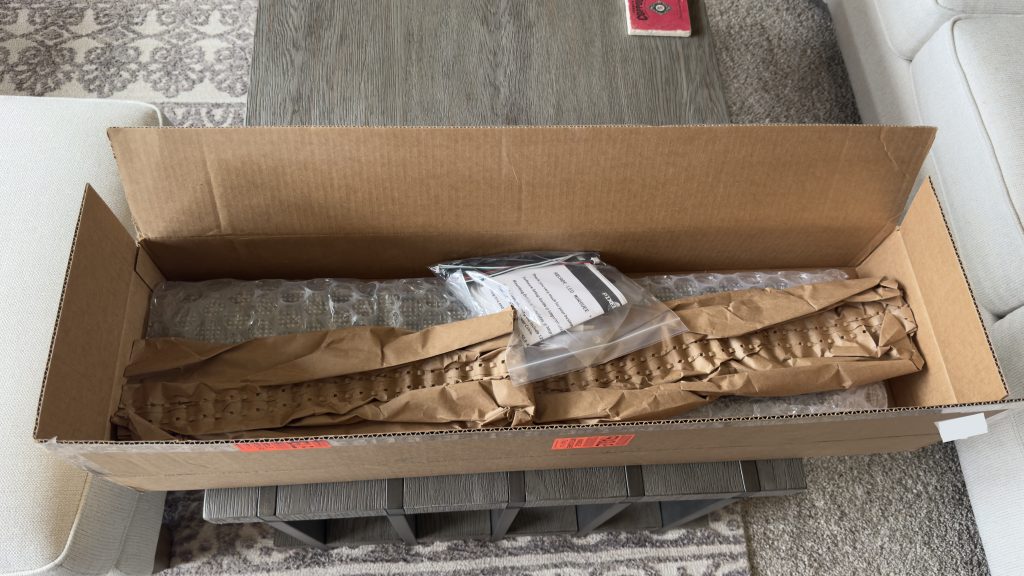
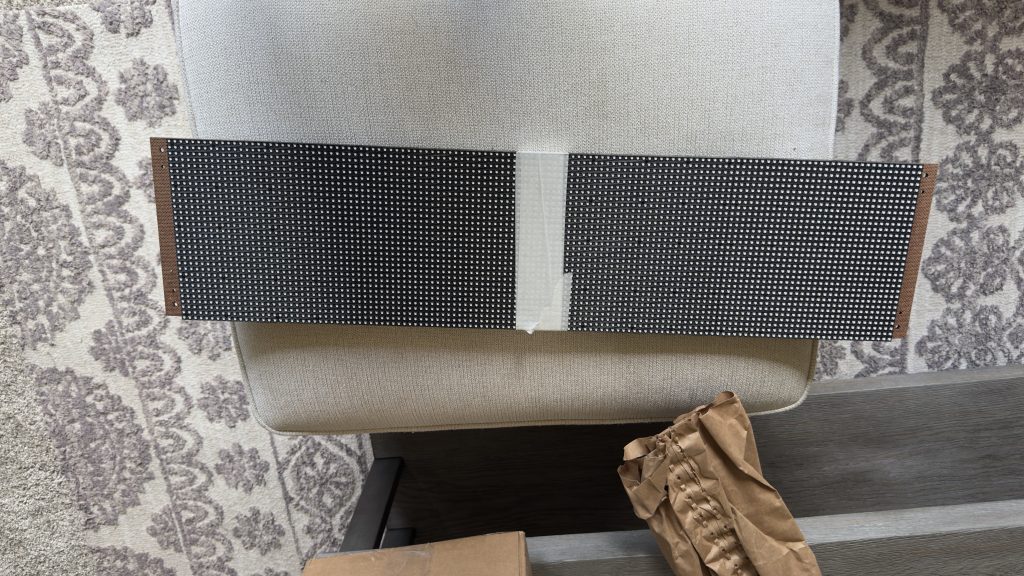
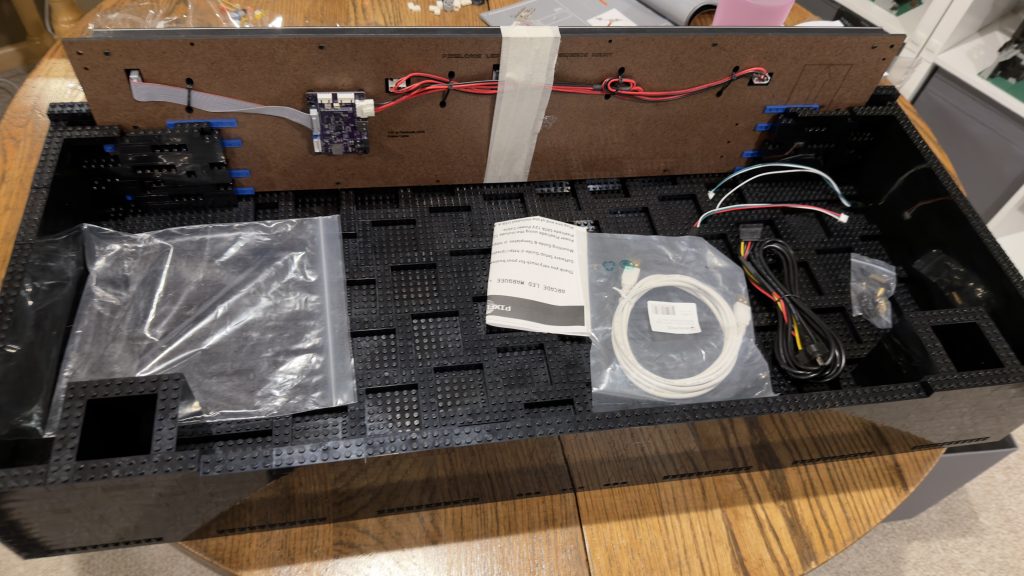
First, I needed to find an option that wouldn’t be too expensive and was easy to hook up into my existing setup. Many of the options out there were either extremely pricy, with some prices topping $1,000.00, while other screens seemed riddled with vague or incomplete information. But, of all the options I did come across, one fit the bill just right. This option was built very specifically for DIY arcade cabinets and came at a reasonable price – the Pixelcade.
From their website at https://pixelcade.org/, I went ahead and purchased the 30 inch Pixelcade LED DIY Kit (P6 size). The reason I chose the LED version instead of the LCD version was simply because I wanted that more 8-bit look. This helps compliment, and add to, the LEGO® look really well I believe.
Building the Final Section
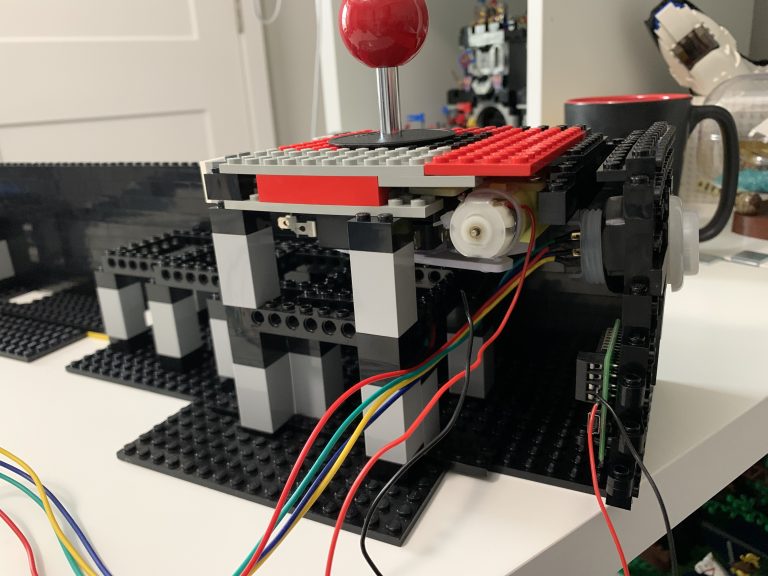
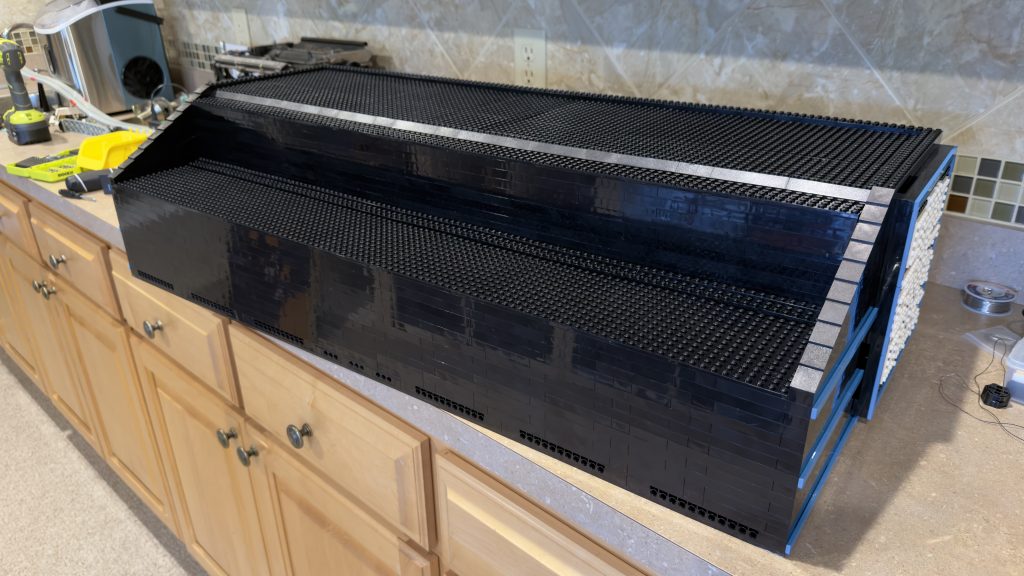
Now that I have the marquee in hand, I need to build a place for the marquee to sit. To begin I start by building in the standard structure to support some heavier weight on top. Because I have a thought for a nice finishing touch later to this cabinet.
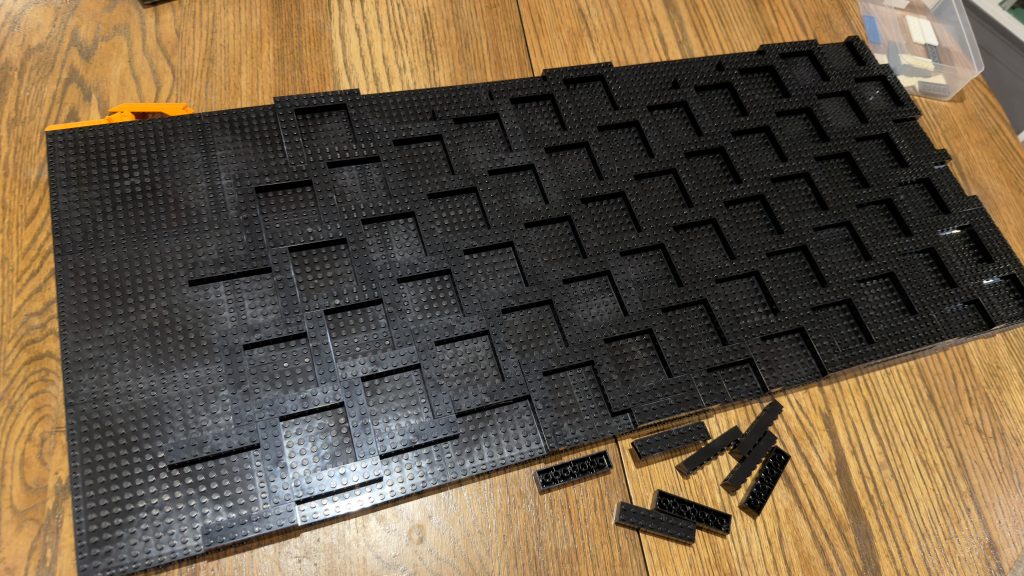
Then I have to figure out how to mount the LED panel using only brick. But, I also want it as snug and tight as possible so the panel doesn’t move around while being transported.
In order to do this, I used some stud-not-on-top (SNOT) brick. Then this allowed me to connect tiles to provide a sort of wall to hold the panel in place from the back.
Wiring Access
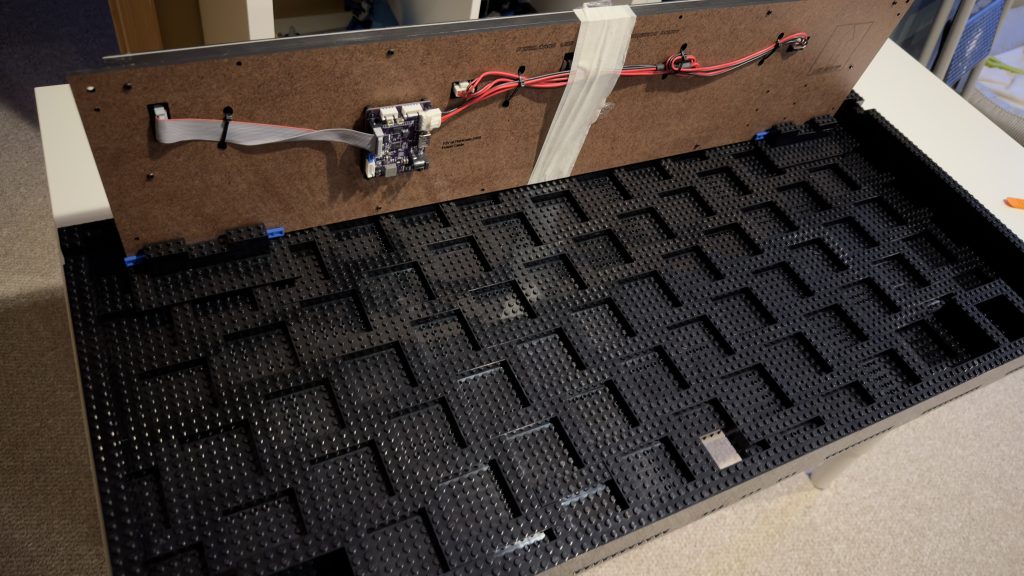
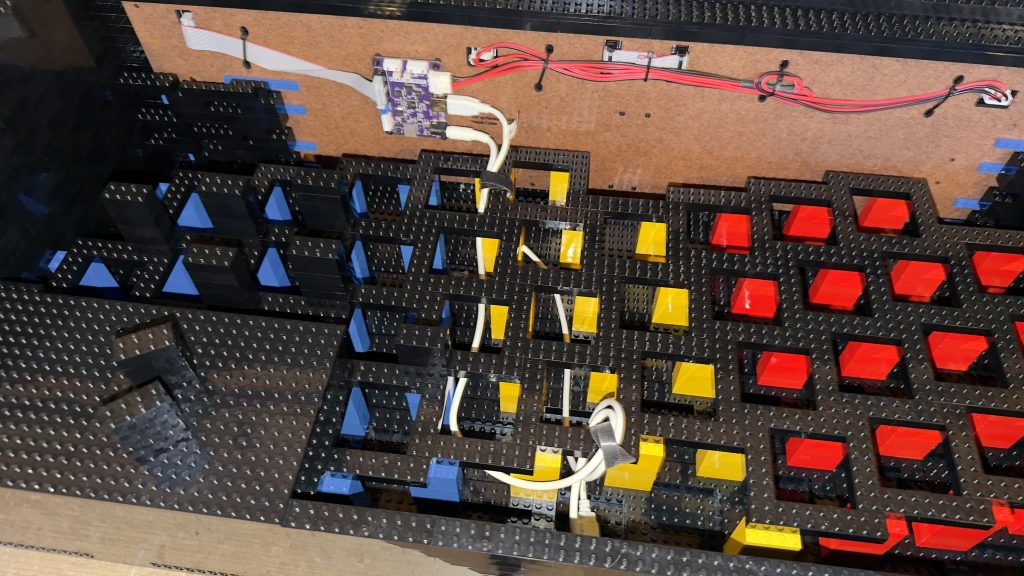
After building up the wall, supporting the marquee now added, I need to start thinking about wiring. Because once this section is closed off, I won’t have access to the control board any longer. Yet i still need to get wires ran from it to the computer at the bottom of the cabinet.
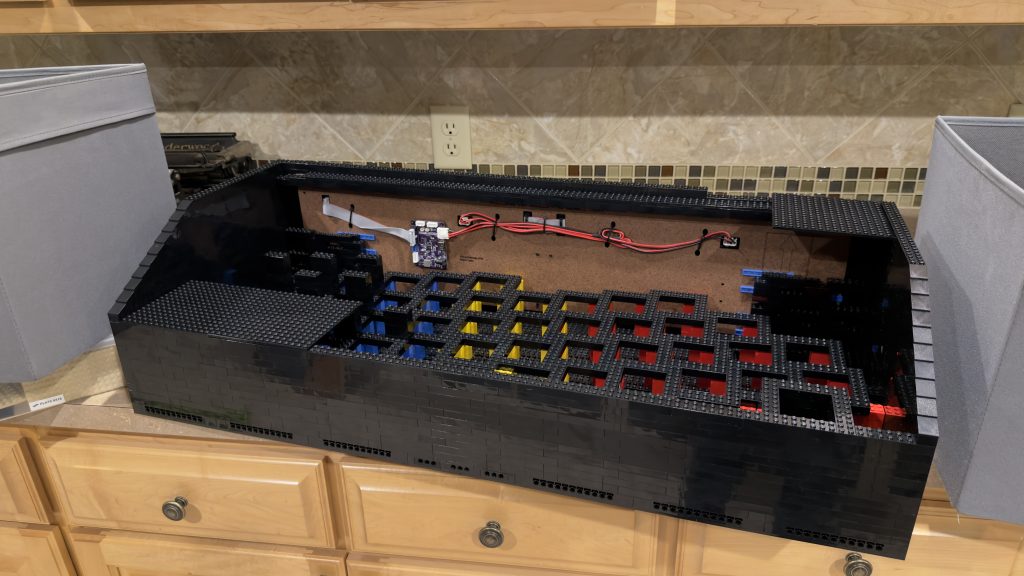
In order to get wires from the circuit board inside to the bottom of the cabinet easily, I figure that I’ll need to move the connections to the board to the bottom of this section. So that I can still reach them after the top is closed off.
To do this, I purchased two extension cables for this purpose – one cable for the power and the other cable for the data. Then after running them through the structure, I tied them to the brick in varies places using velcro straps to ensure that they were secure.
This will make plugging in these cables when assembling the cabinet much easier.
Introduction of a Long Planned Design Element
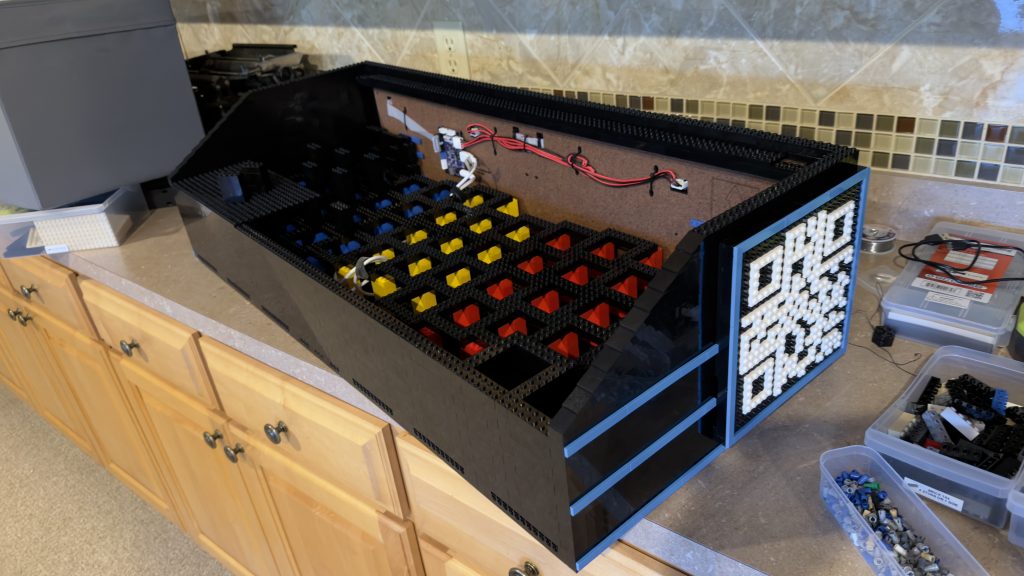
From the very beginning of this build, I always envisioned adding artwork to the sides of the cabinet, elevating the magic. Finally, I’ve started this process.
While it’s not actual 8-bit artwork on the sides, my wife created a QR code out of brick for me to affix to the side of the marquee. This QR code, when scanned, will take you to this very website https://thebrickade.com/.
There was a lot of consideration on choosing which technique to use to stick artwork to the sides. We eventually decided to stick with stud-not-on-top (SNOT) brick and 16×16 plates.
For now, this will be the only “art” on the sides. Because I’ll need to go back and add the SNOT brick to the rest of the arcade sections. And for now, I’ll do this at a later time.
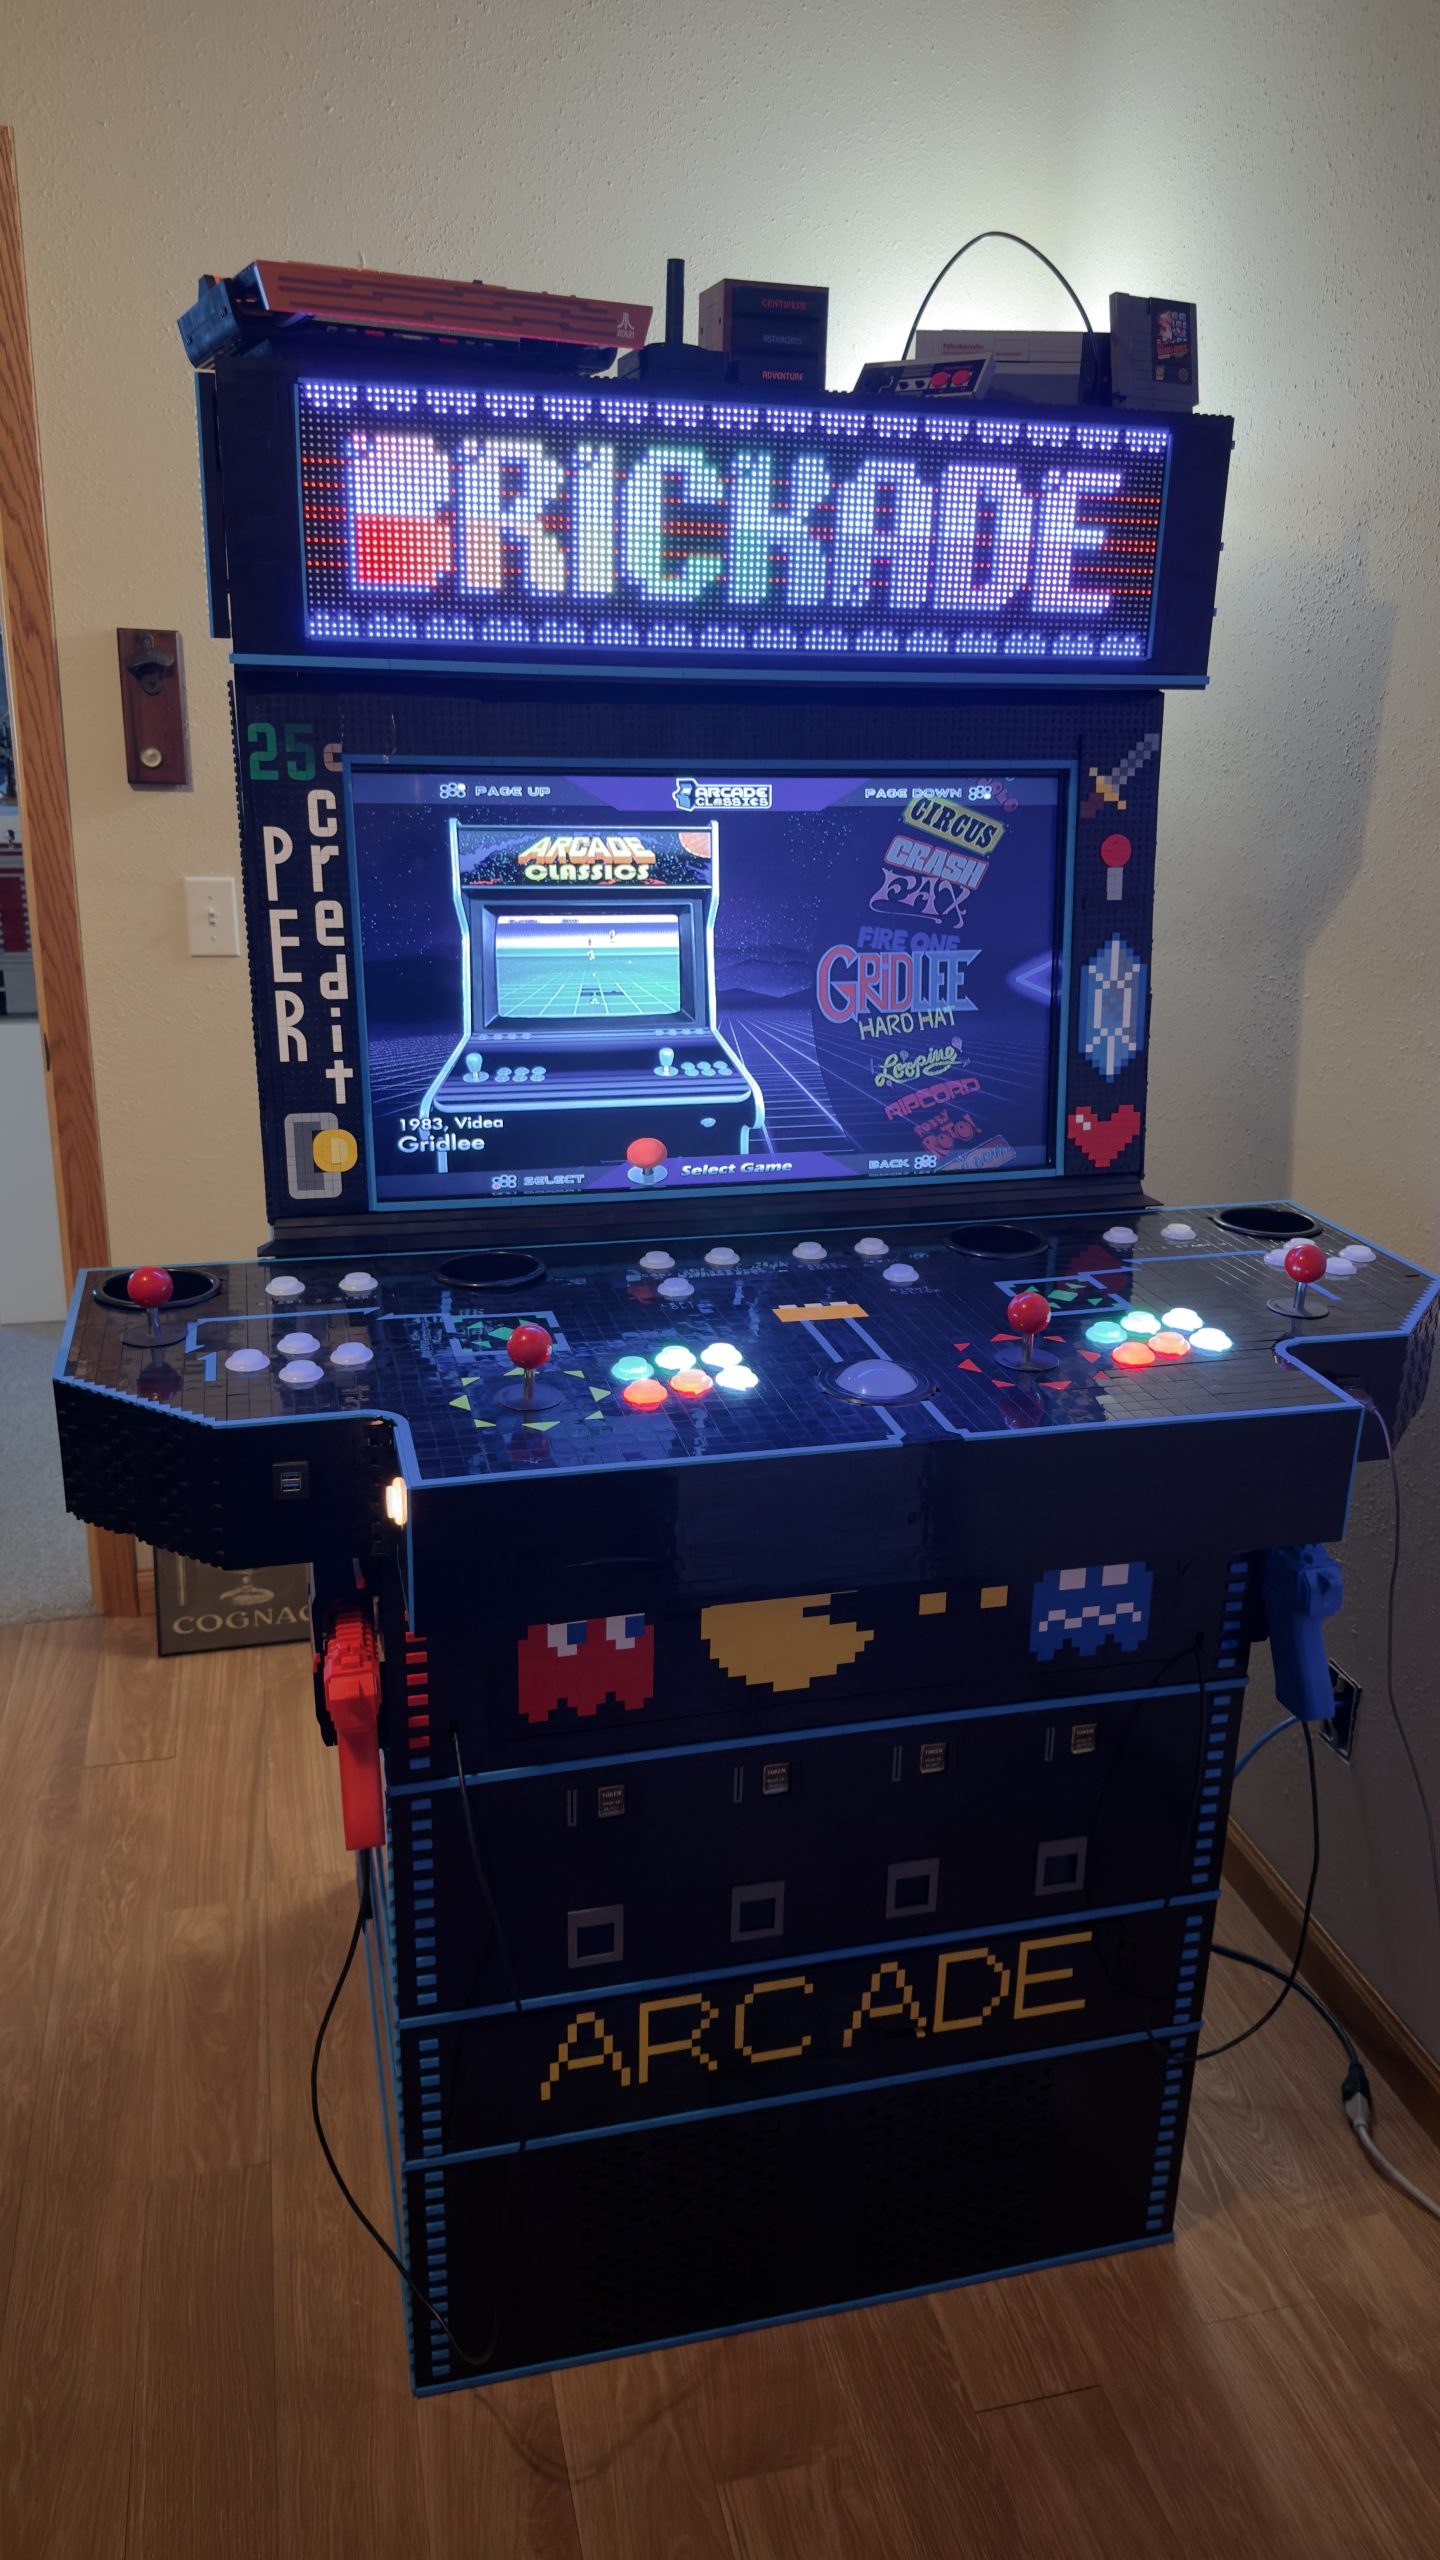
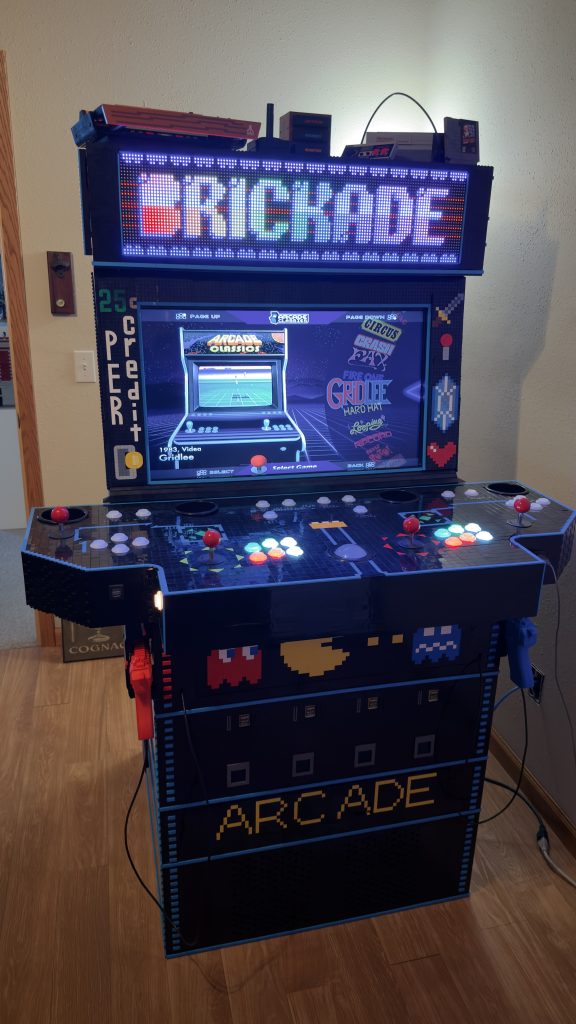
Adorning the Cabinet with Arcade Magic – Marquee Now Added
After placing an order for the last brick needed, I’m excited to finish this project and move on to the next phase. I tried to mimic as much of the classic arcade cabinet look as possible using LEGO® brick.
To finish this off, I add plates to the top. Two different levels were used so that they were hidden from the sides behind the slope.
And now, I’d like to present to you all the finished arcade cabinet built entirely from LEGO® brick with the marquee now added.
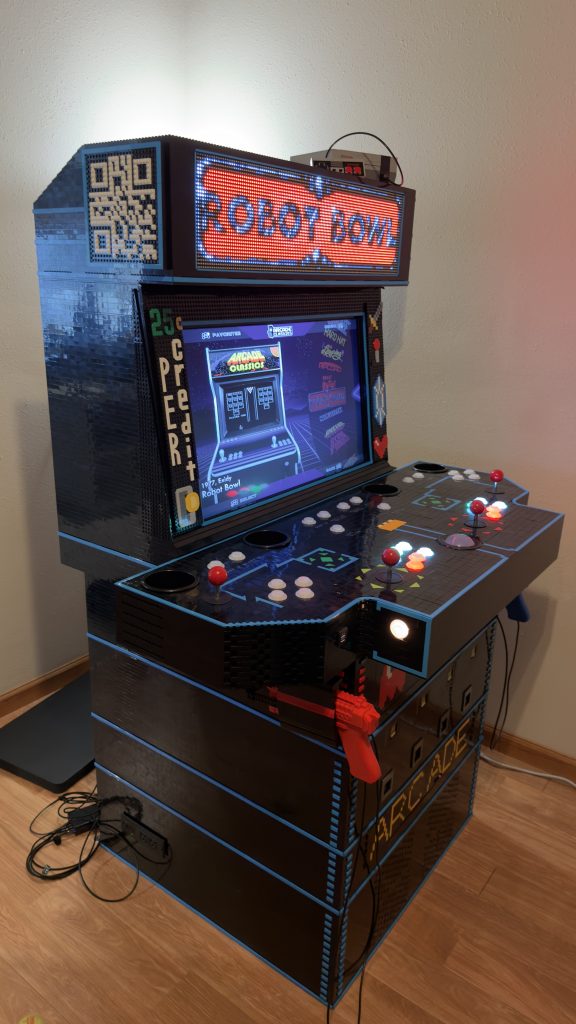
With the marquee now added, I’m thinking it would be appropriate to display actual LEGO® sets on the top. To remain with a theme, it was only fitting to display the Nintendo Entertainment System™ and the Atari® 2600 LEGO® sets.
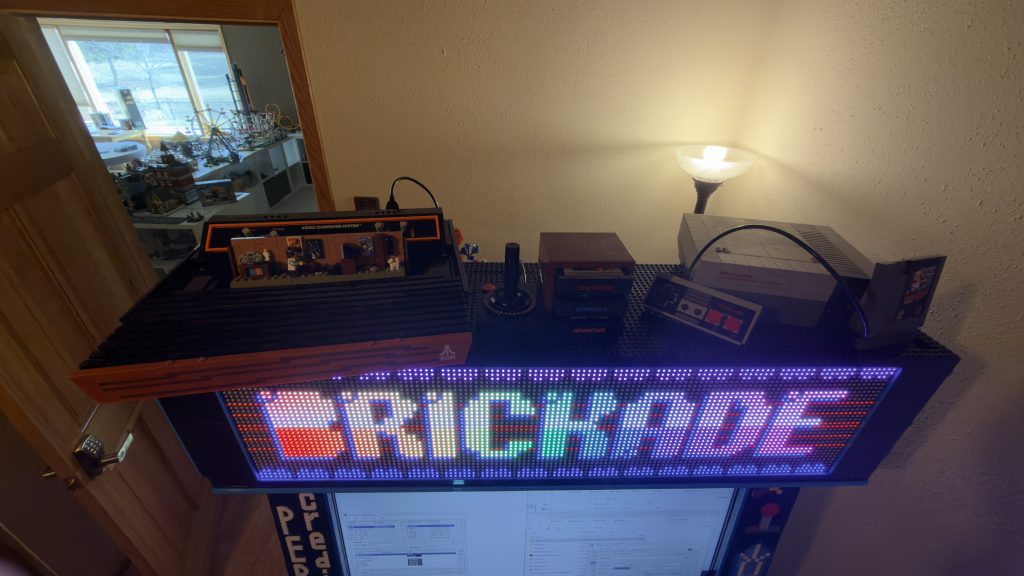
If you recall, the LEGO® Super Mario™ Nintendo Entertainment System™, was the set that started it all! Starting from the very beginning of my story to build an Arcade Cabinet Made of LEGO® Bricks.
A Special Thank You
This project was very difficult and a considerable amount of work. Not only did I have to build a large structure out of LEGO® brick. But I also chose to have it meet the following criteria:
- No glue, wood, nails, or screws
- No modifications to any actual brick
- And, not only did the structure need to be stable on its own, it had to hold up to button mashing
Besides the structure, I also had to build the computer, AND do all the programming. This includes:
- Procurement of the games
- Programming each game to the proper buttons
- Setting each button to the appropriate colors for each game / console
- Configuration of the software
- Design of the artwork
- Backups so I don’t lose any of my work
Then finally, moving and life that just happens in the span of four years! As I got married and moved twice in that time!
But as a result, I found someone that embraced this crazy project of mine and supported me throughout its completion. So a special thank you to my wife!
Thinking back through this journey, I want to make sure to thank all who I can:
- First and foremost, my wife!
- My parents for getting me the Nintendo Entertainment System™ set in the first place
- Minneapolis LEGO® User Group TwinLUG – for helping with structural issues
- Greater Midwest Lego Train Club (GMLTC) – for allowing me to use their parts for prototypes
- Many of BrickLink sellers out there that helped with my procurement of parts such as Topher‘s Brick Emporium, Cutthroat Brick, ACE of BRICKS, LeosArtifacts, and many others
- The creator of the Pixelcade
- The developers and the community of HyperSpin
- Daniël Spies, a seasoned designer of arcade and pinball machines
- Many YouTube videos from folks like Simply Austin, Planet Geekdom, and Maverick‘s Arcade
- The company Ultimarc and it’s wonderful support staff
- The SuzoHapp company and it’s wonderful support staff
- Creator‘s of the Sinden Lightgun® product
- The contributors to projects such as UCR, Borderless Gaming, HDMI-CEC Adapter
- The creator‘s and developers behind MAME and many of the other PC console emulators available today
- And finally, a big thank you to The LEGO Group for creating such a simple element that can contribute to so much creativity, inspiration, and passion
Final Stats
After all of that, here are the answers to the big questions!
How many pieces?
I built this into 7 sections, (1) the base, (2) the coin bin, (3) the coin chutes, (4) the storage cabinet, (5) the control panel, (6) the display, and (7) the marquee. So here is the piece count for each section and then the total.
Base: 2,886
Coin bin: 2,352
Coin chutes: 2,787
Storage cabinet: 2,568
Control panel: 6,035
Display: 3,678
Marquee: 2,623
Total: 22,929
How much does it weigh?
Weight of LEGO® brick ONLY
Base: 23.48 lbs
Coin bin: 18.49 lbs
Coin chutes: 19.89 lbs
Storage cabinet: 21.68 lbs
Control panel: 20.61 lbs
Display: 32.8 lbs
Marquee: 20.71
Total: 157.66
Weight of Electronics
Base: 42.3 lbs
Coin bin: 0 lbs
Coin chutes: 3.49 lbs
Storage cabinet: 0 lbs
Control panel: 9.19 lbs
Display: 5.6 lbs
Marquee: 2.89 lbs
Total: 63.47 lbs
Total weight combined
221.13 lbs
How long did it take you to build it?
Honestly, considering how much work was involved in this project over the years, I very quickly lost track of exactly how many hours I stuck into completing this project. However, from the time that I created my first sketch, 4 years and 9 months has passed until now.
So, 5 years is a vague number that I can say that it took me to complete this project to where it’s at today.
How much did it cost?
LEGO® Brick: $7,595.67
Computer: $2,505.76
Storage System: $1,760.21
Electronics: $1,119.17
Software: $106.00
Grand Total: $13,086.81
A Few Extra Stats
Different elements: 195
Different colors: 25
Different pieces total: 346
(color and elements)
Most used part:
2×8 bricks – 7,736
Second most used part:
2×2 tiles – 1,407