Loading Up the Arcade: Ultimate First Test
Before loading up the arcade and showing this in June at Brickworld in Chicago, we decide to bring it first to a show in Minnesota called Brick Convention.
Loading Up the Arcade
The first task is to see how we can transport the arcade cabinet. Can we fit the entire cabinet inside our car or will we need to rent a truck? Loading up the arcade into one vehicle is the ultimate first test.

And this thing is huge! Thankfully, we have a vehicle with tons of room and many hidden compartments where we can store the pieces of the arcade. And the doors on the back open upward which provides a much wider opening for setting in some of the larger pieces.
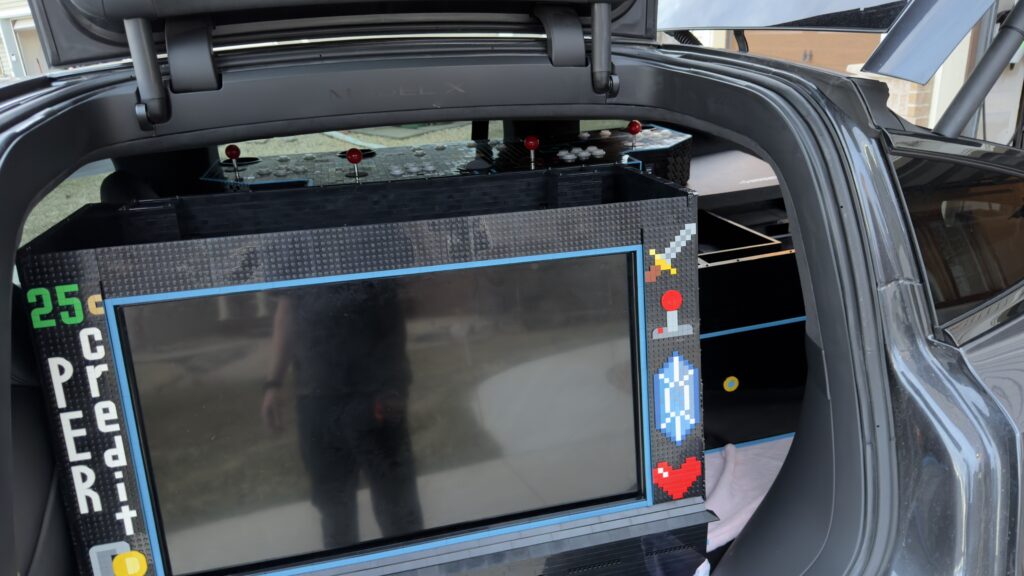
After playing a couple of rounds of Tetris, we got everything to fit! So, onward to the second level of the game!
Transportation
Traveling with all of this stuff in the back was a little nerve racking. And anytime there was a bump in the road, the rattling of the brick was intense. As a result, I felt like dodging all the pot holes was like playing an arcade game all on its own.
Driving on the freeways was much better. So, granted we don’t run across any gravel roads, I’m optimistic the drive to Chicago should go well.
Eventually, we arrive at the show and started unloading!
Unloading and Set Up
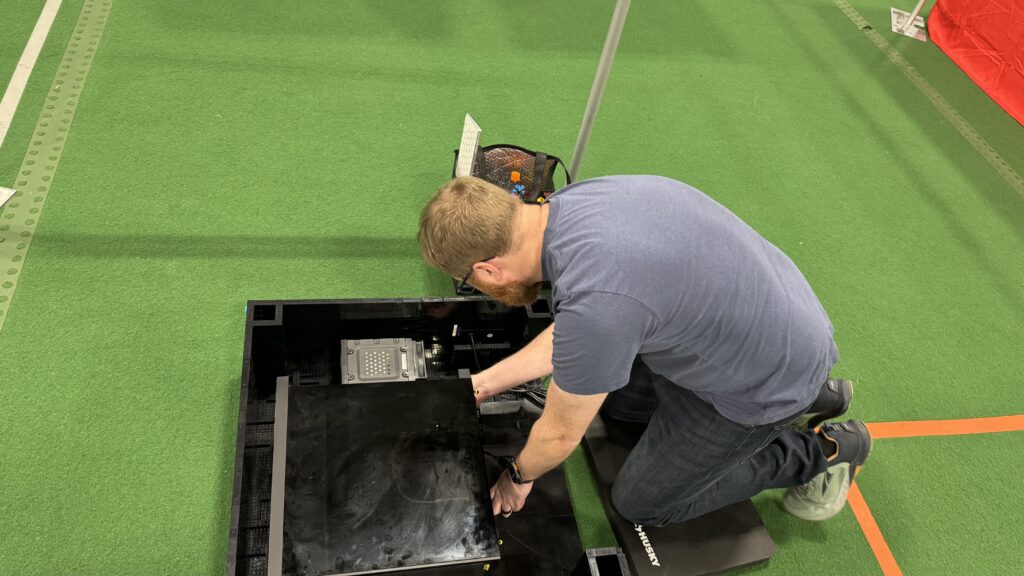
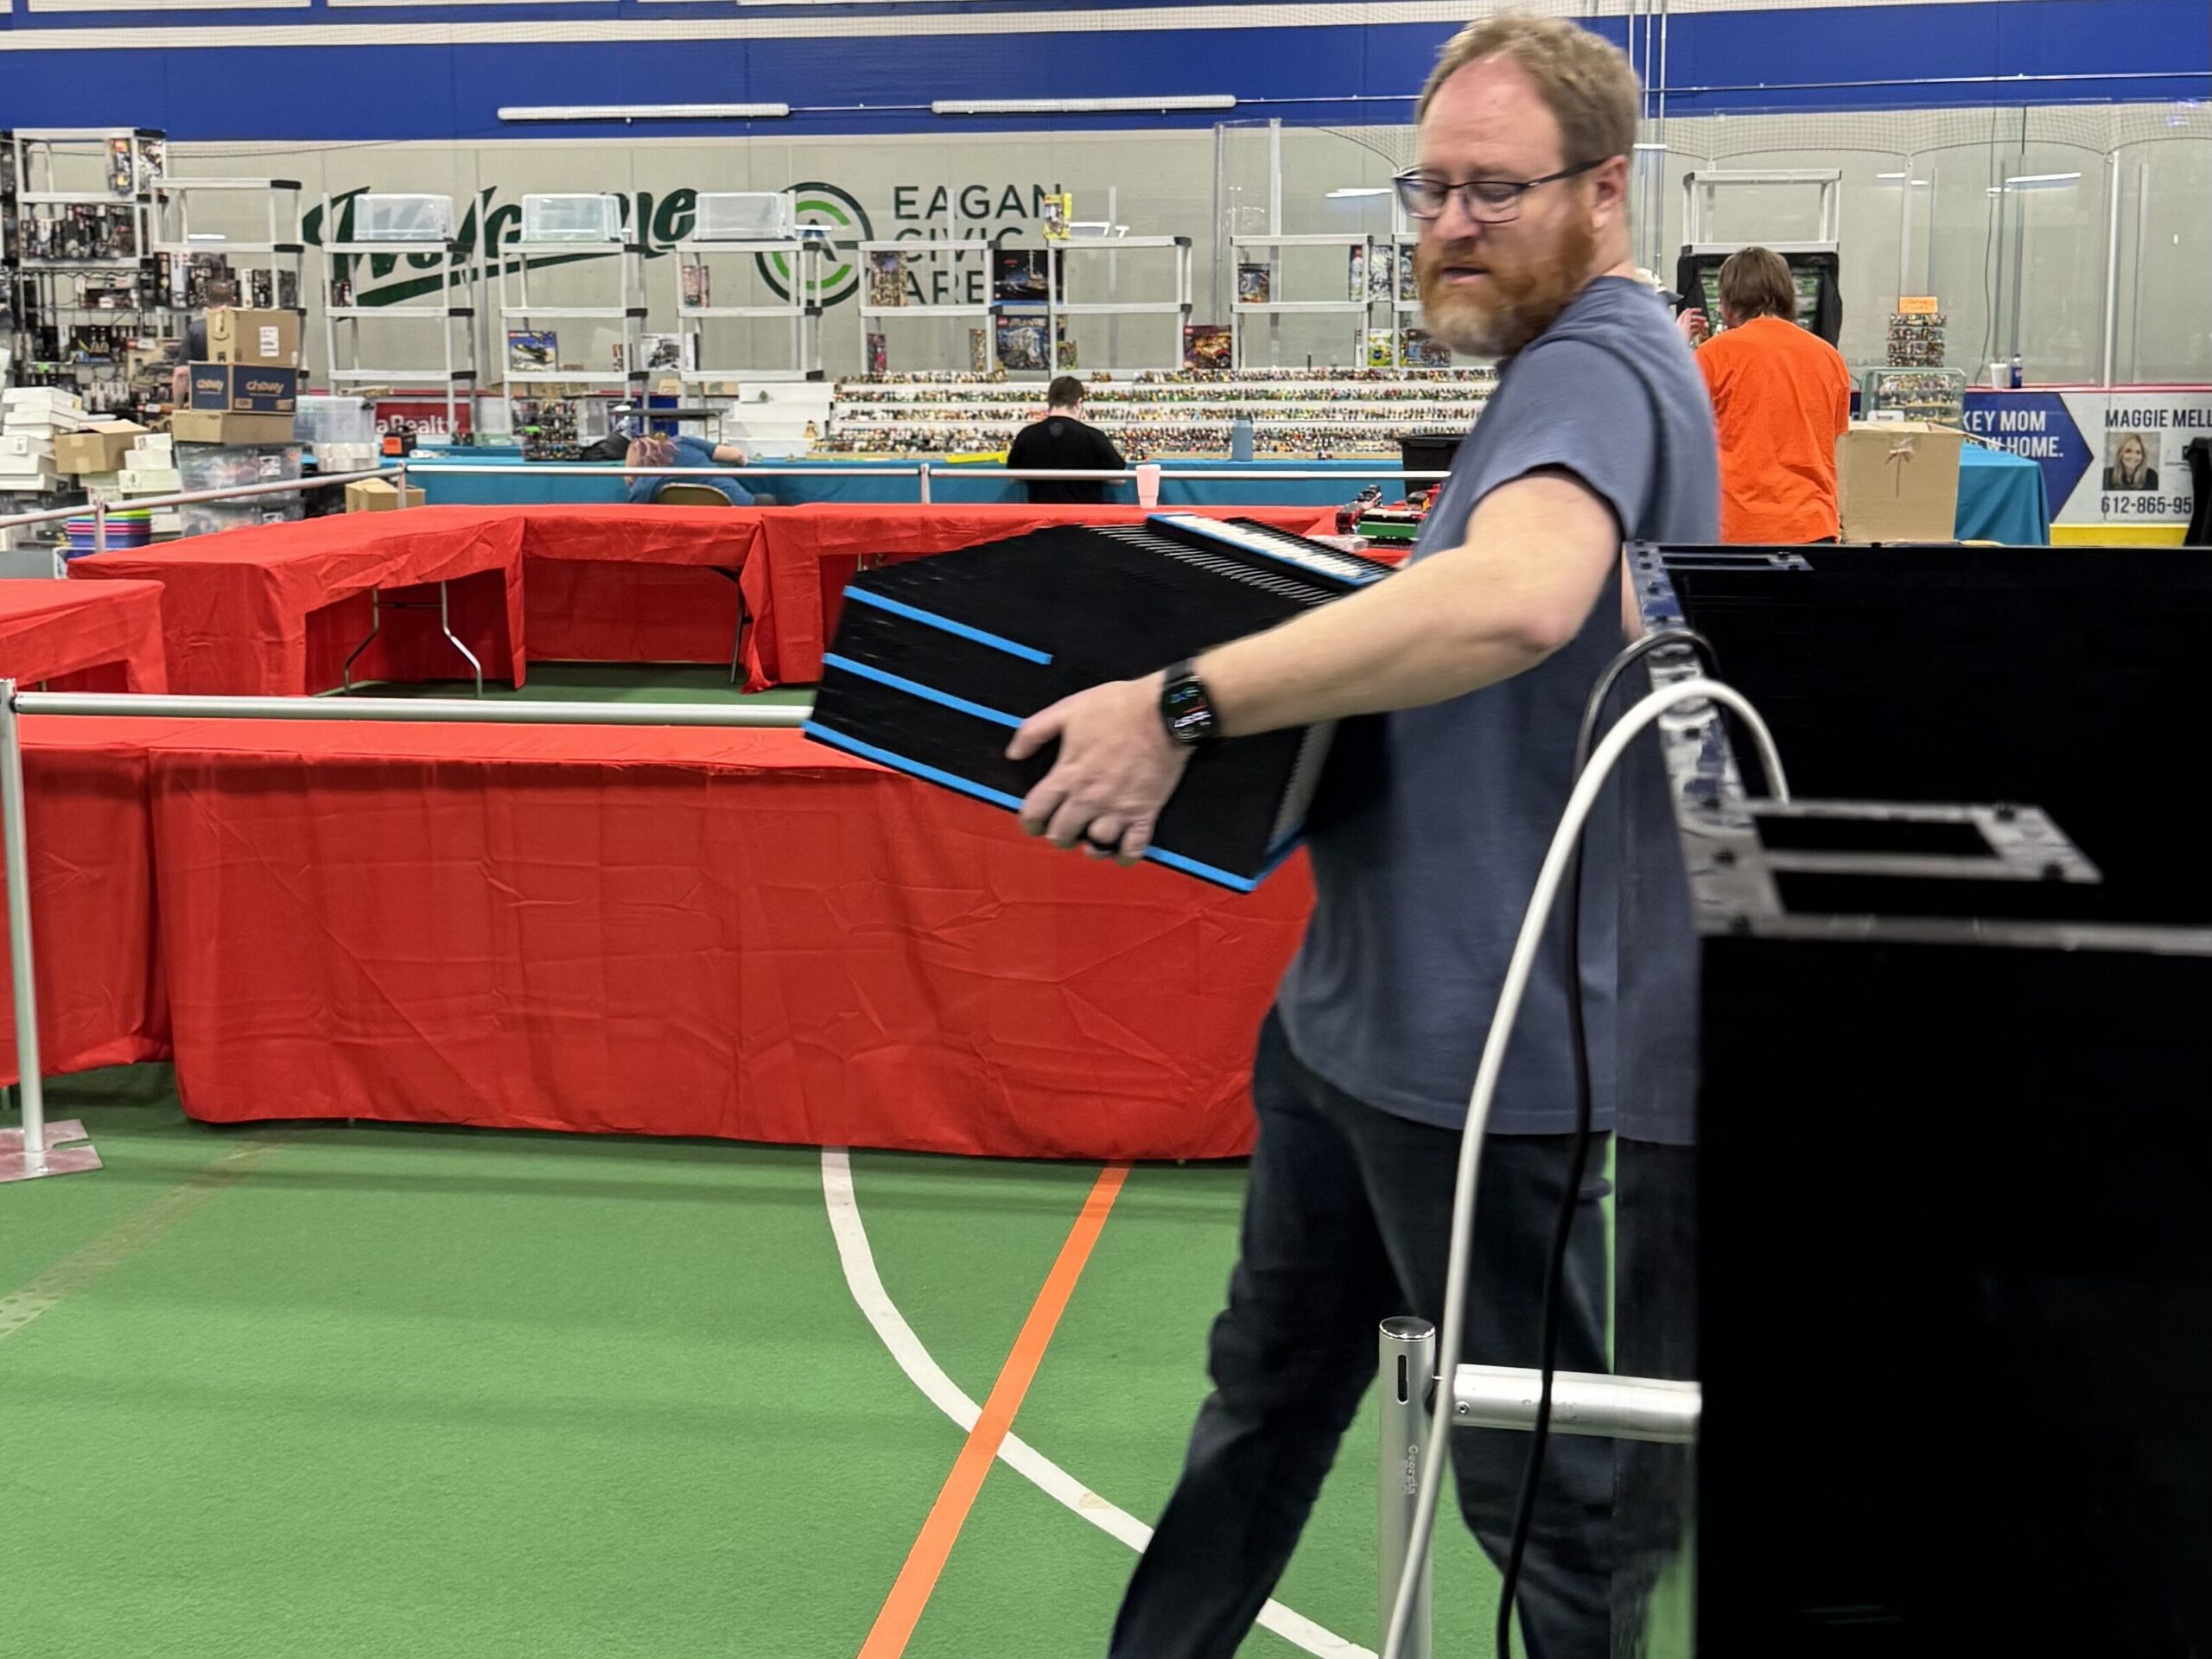
We get to the show and begin to bring the pieces and assemble the arcade.
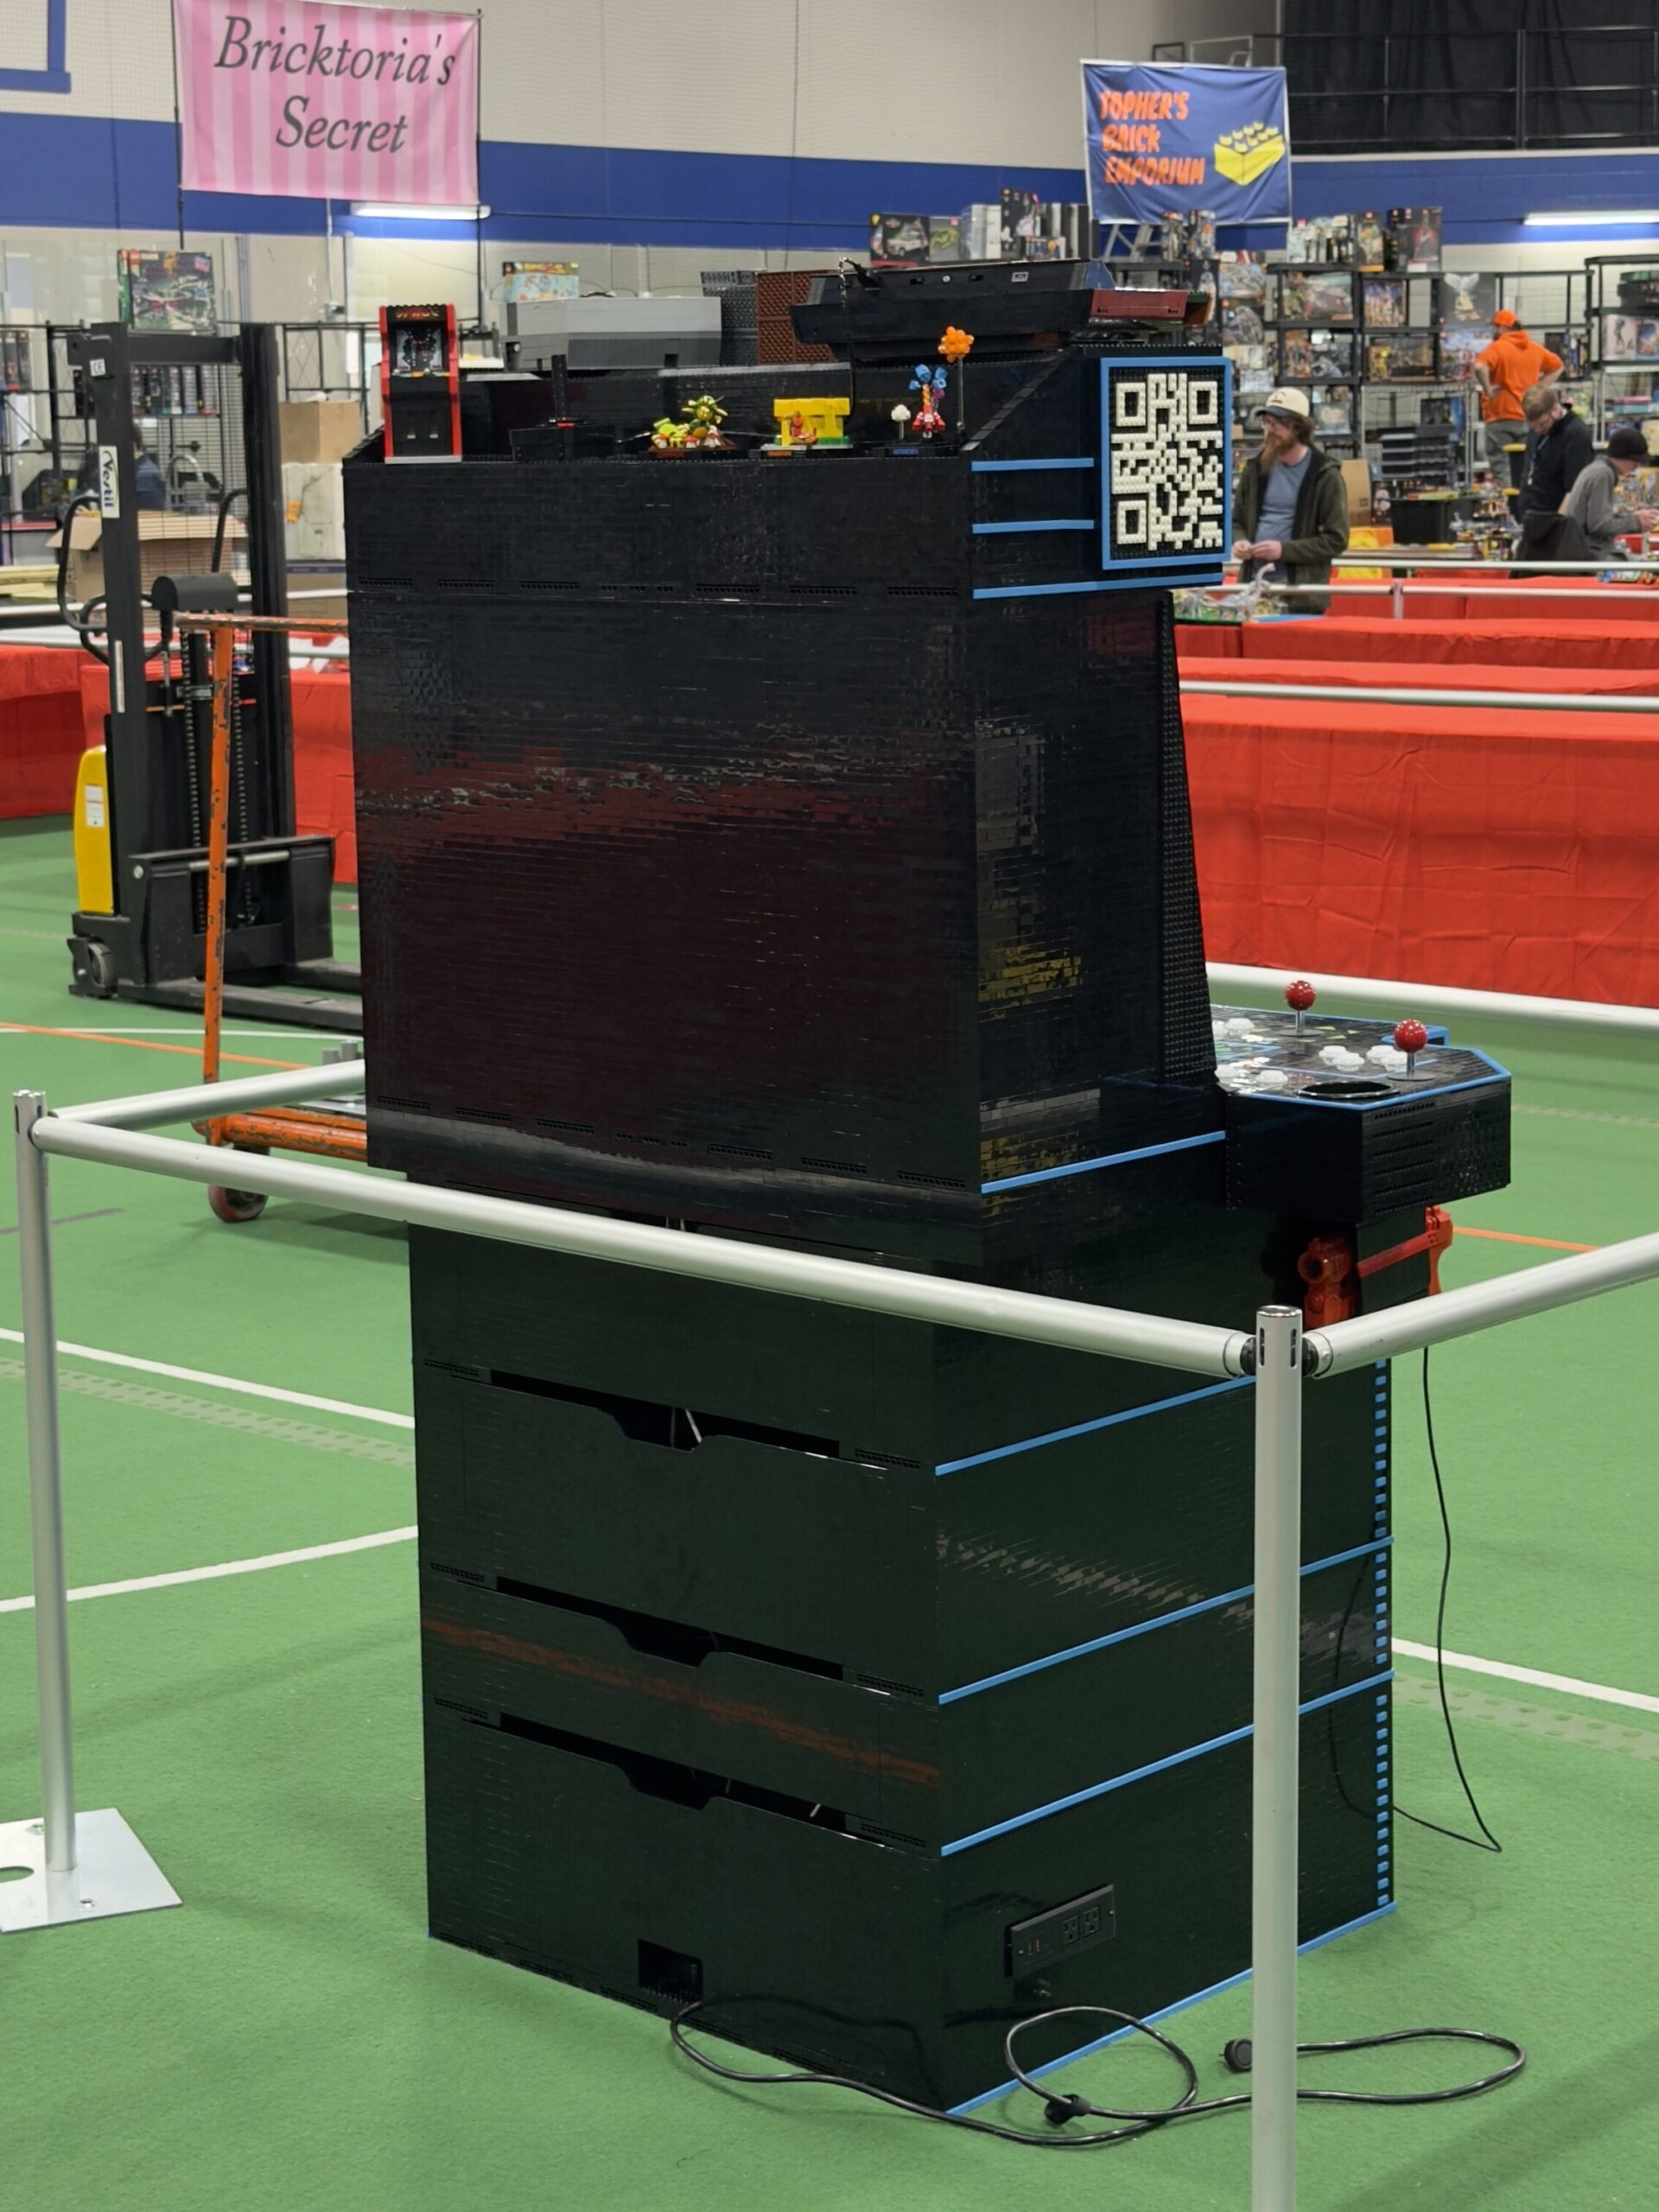
First, setting the base down. Then adding the computer, and then connecting the storage.
Then, next layer is the coin storage bin.
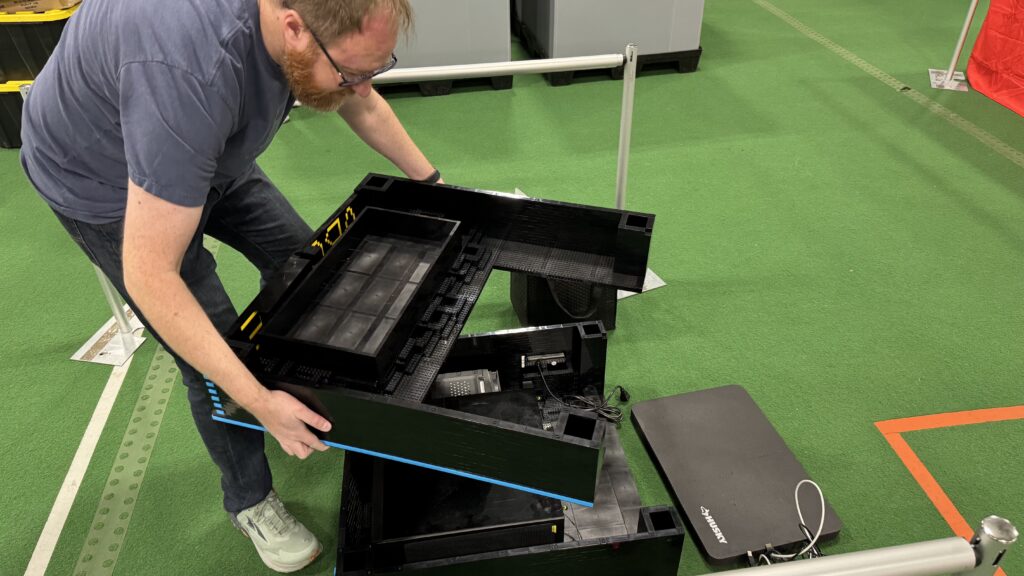
After that, I add the coin chutes.
And then the storage is added on top.
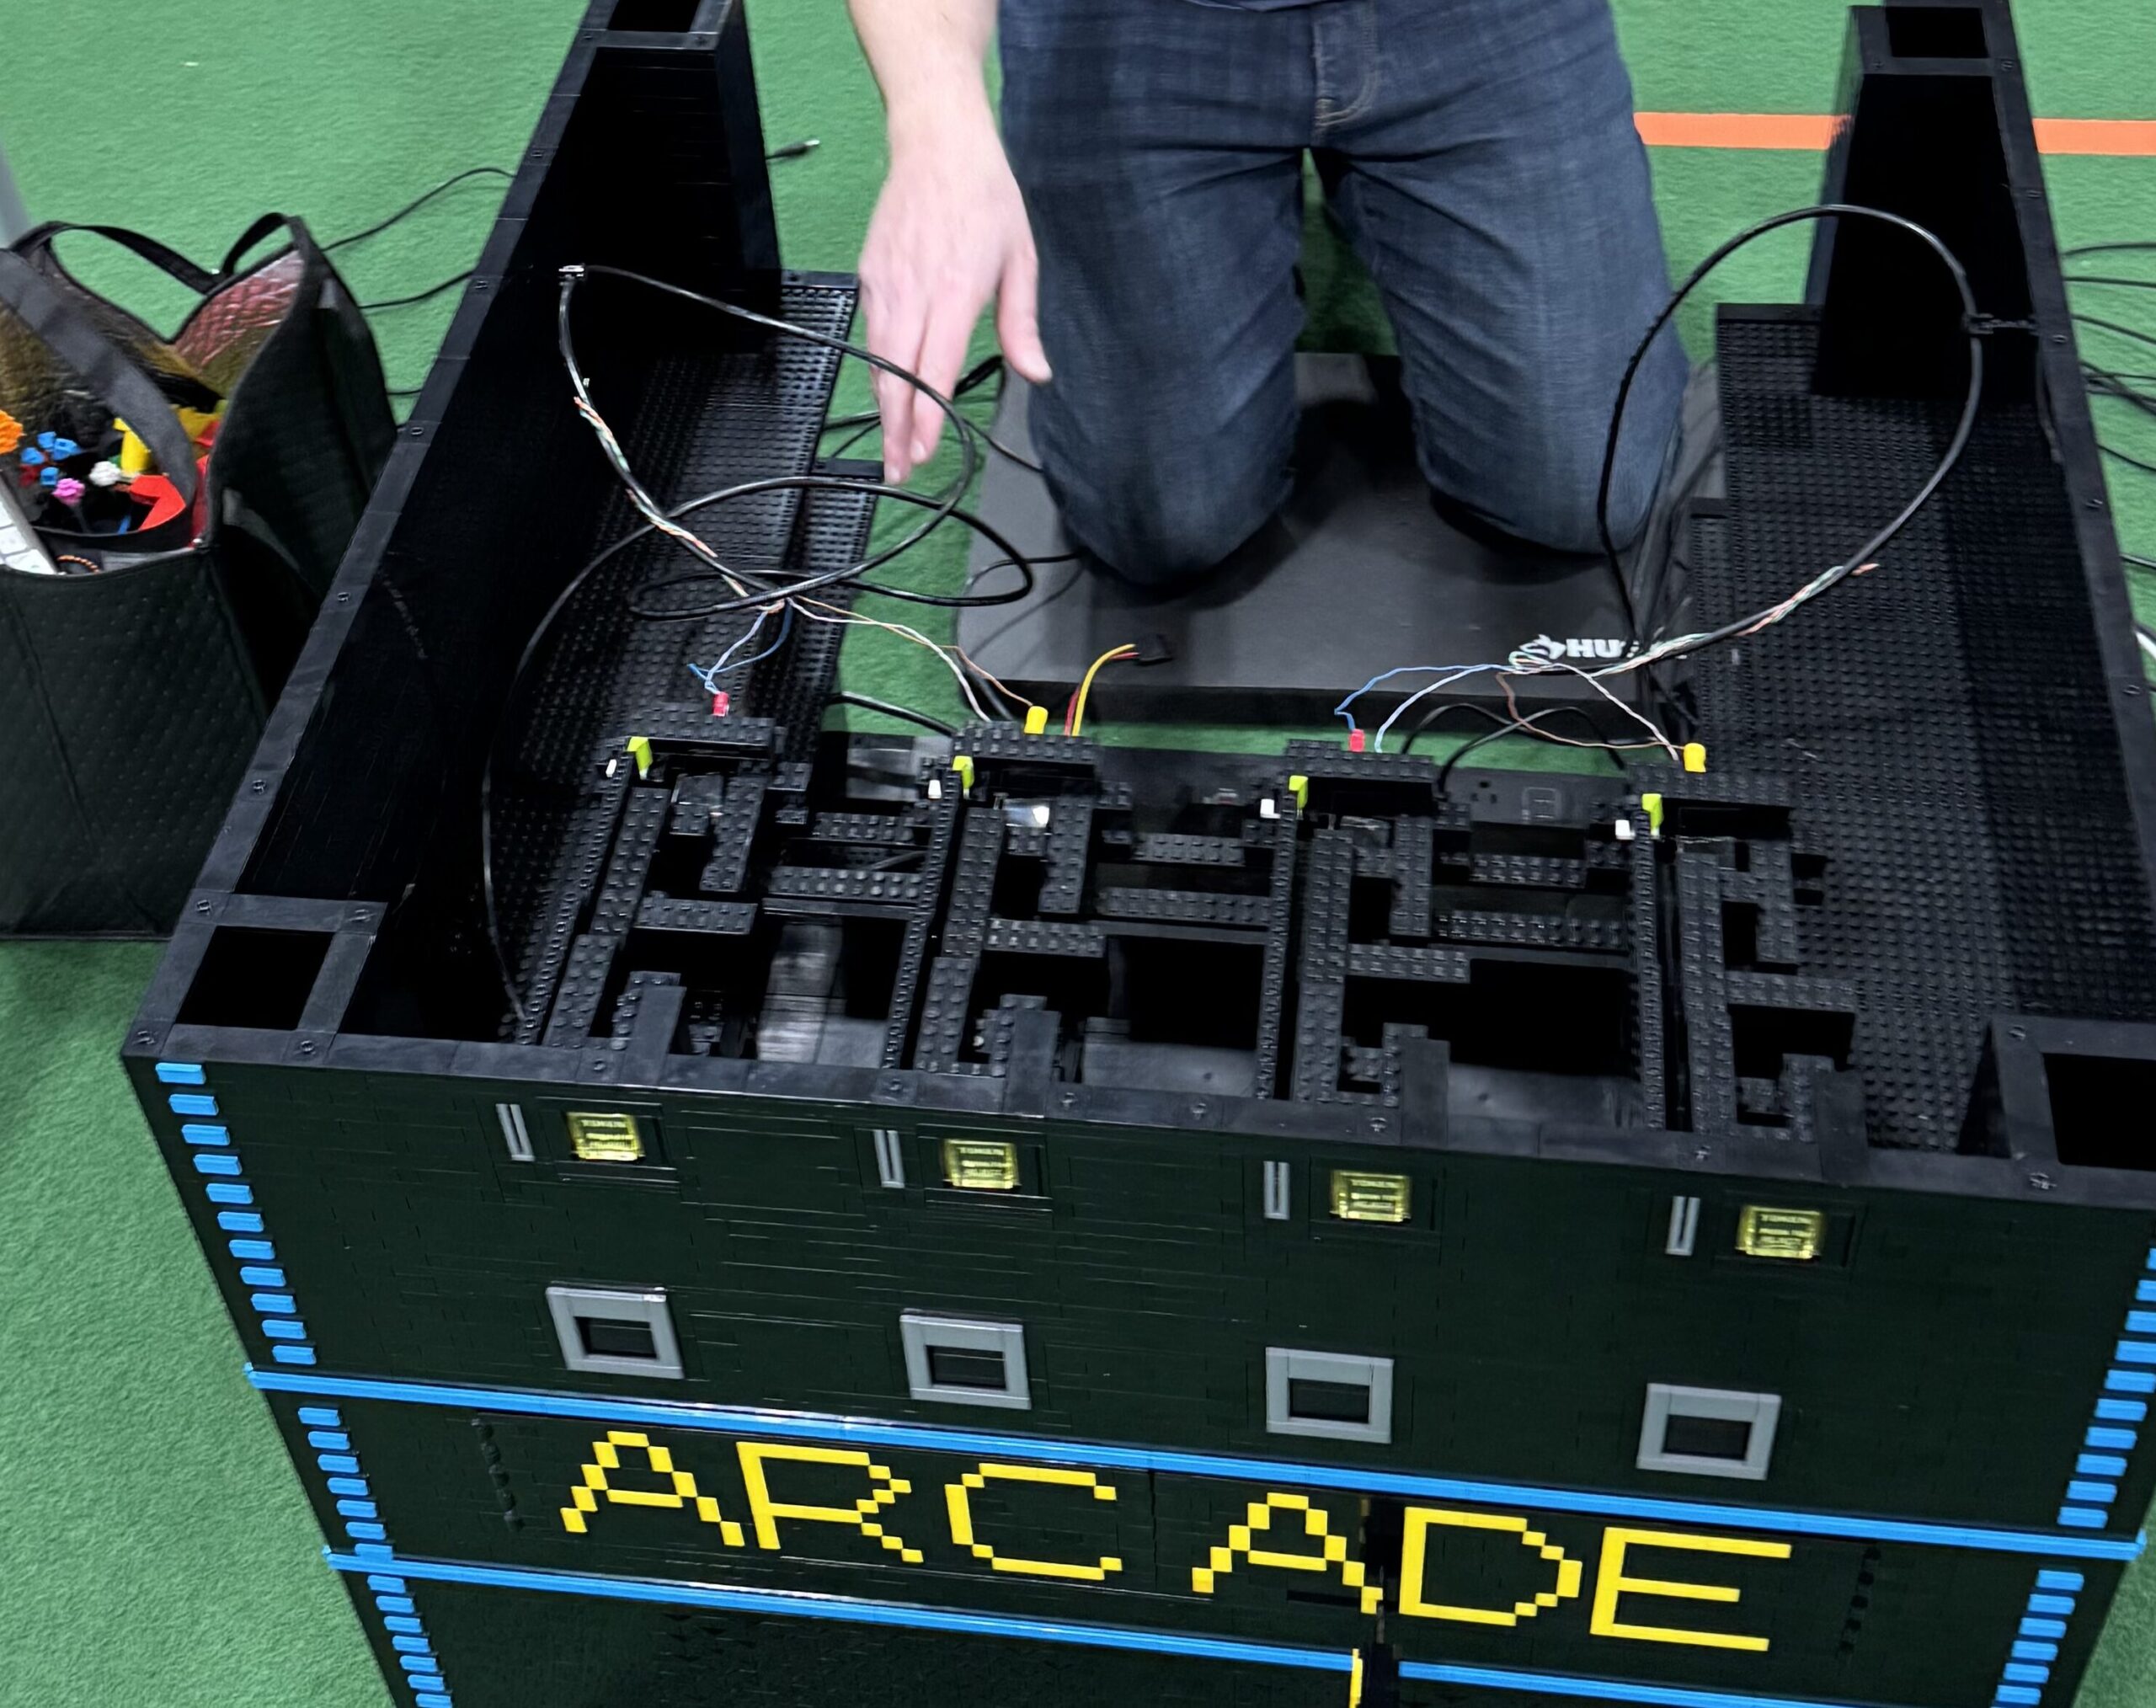
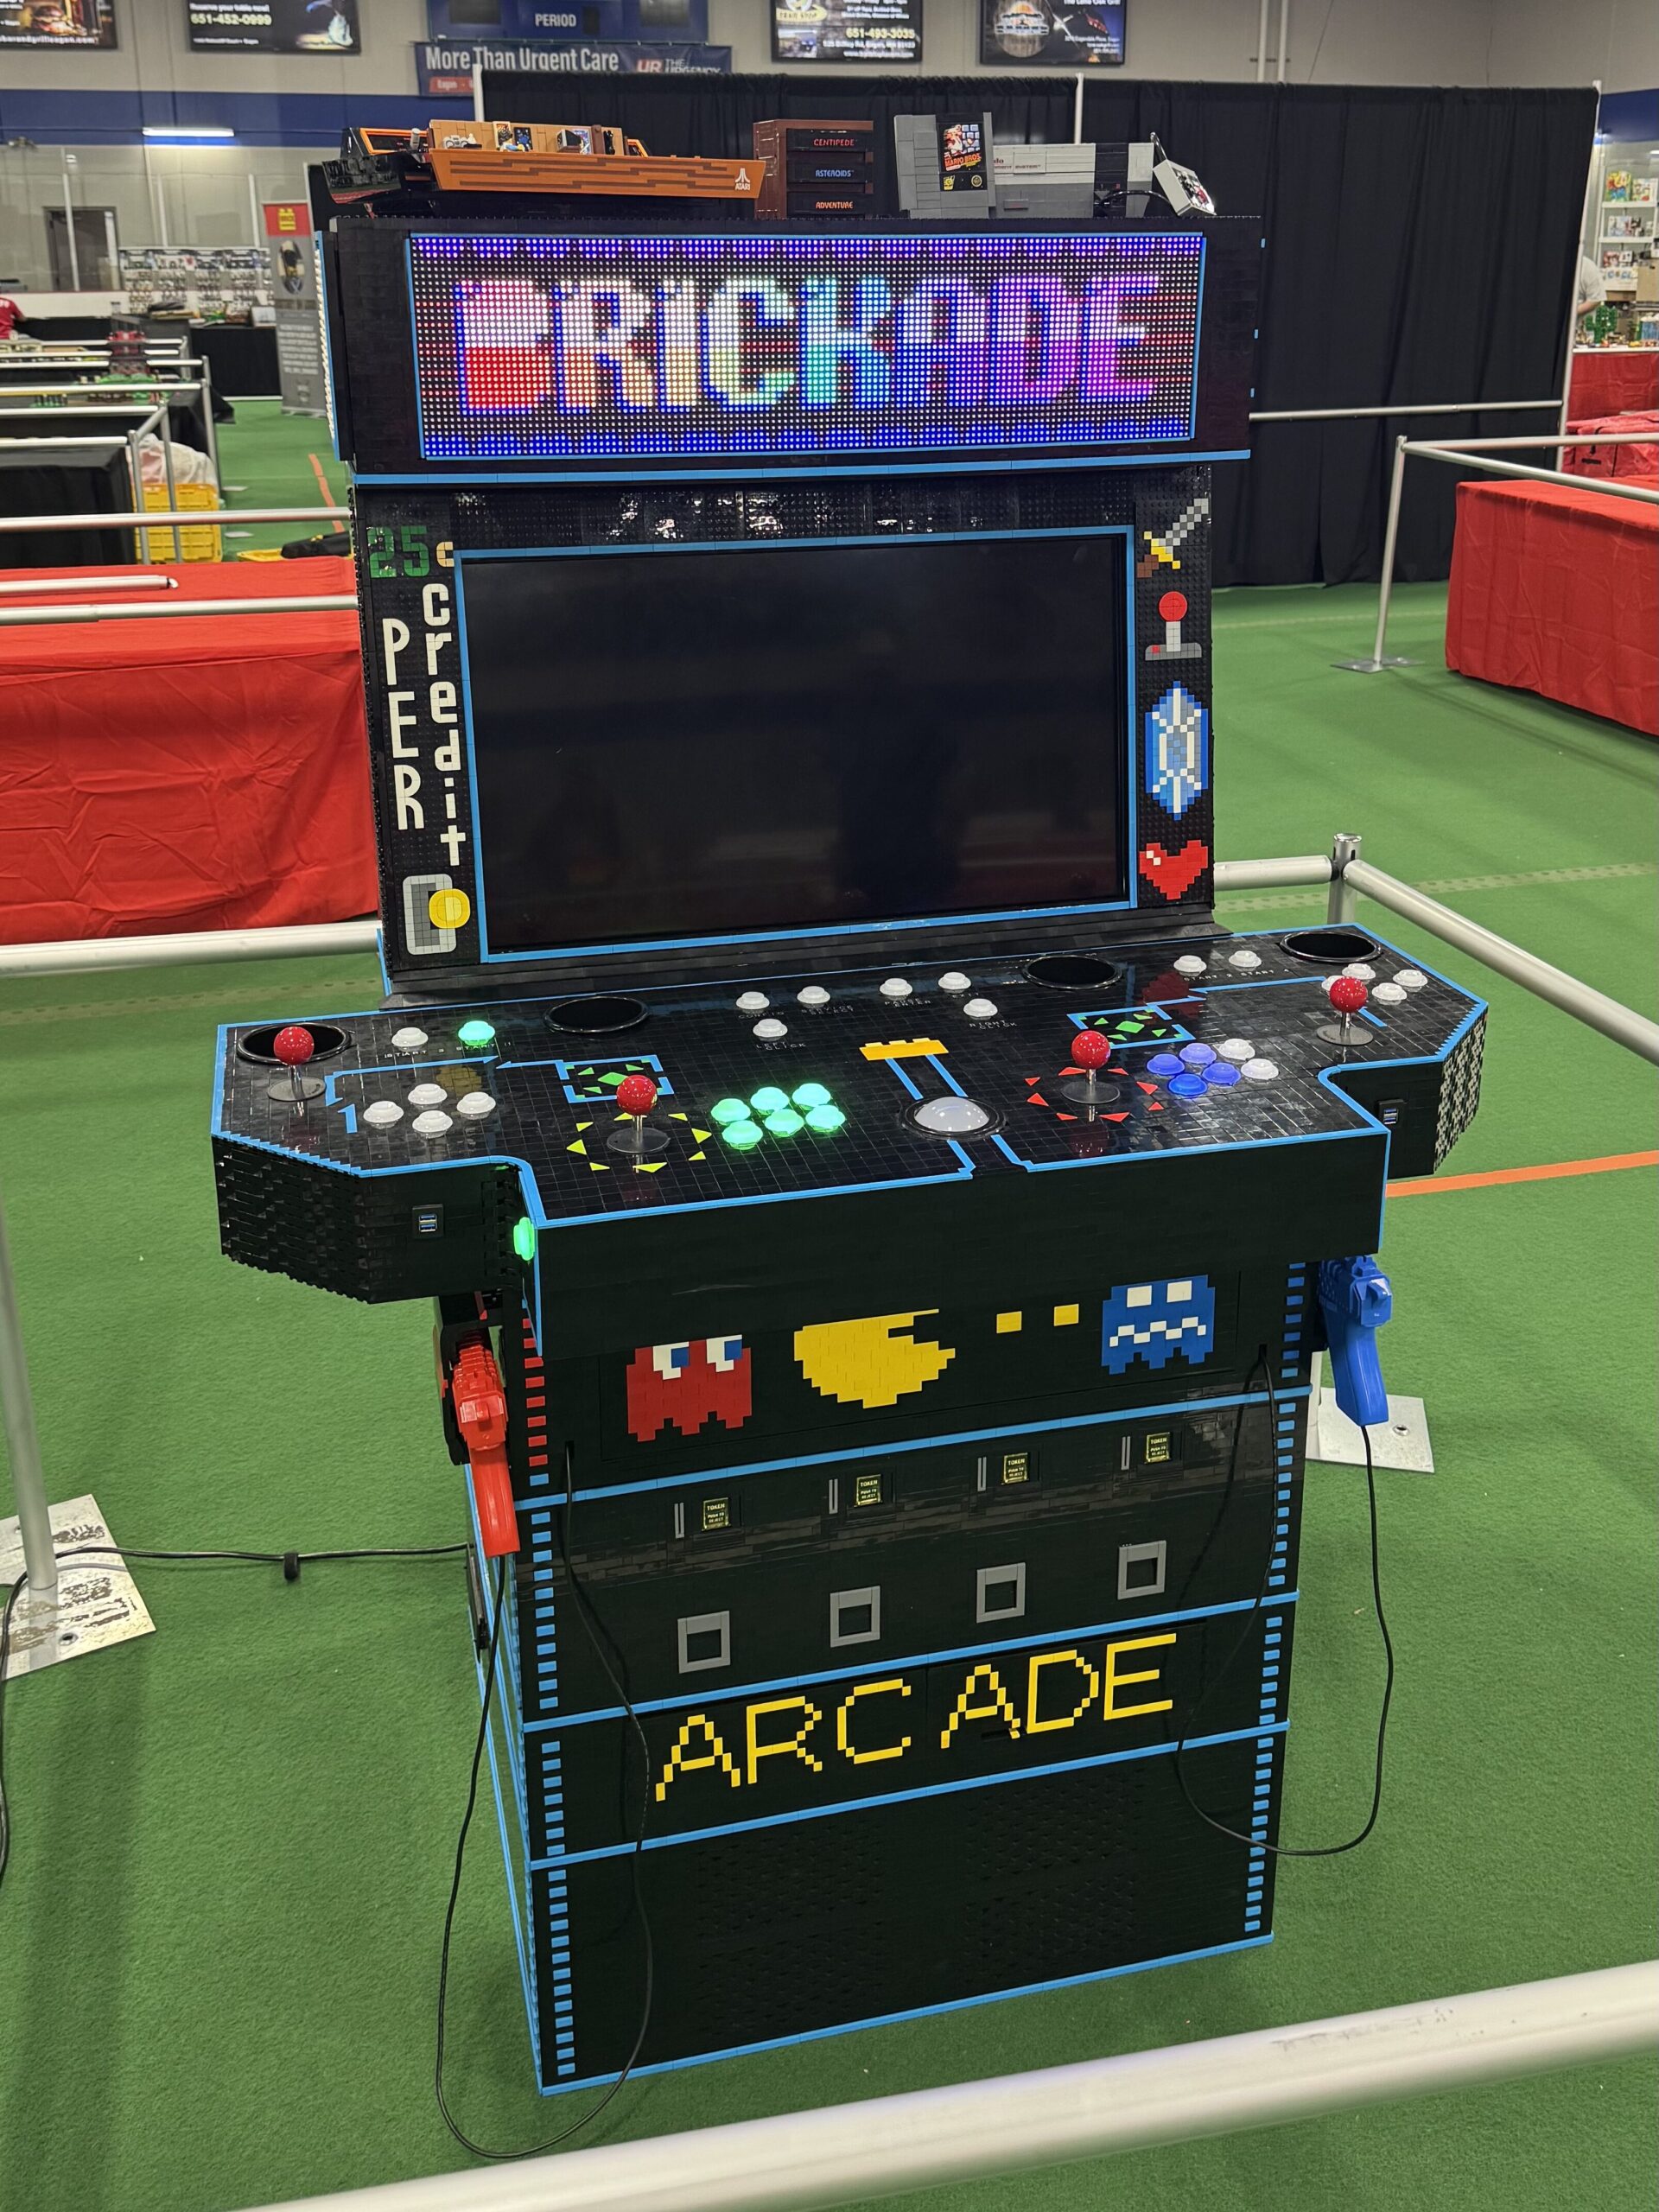
After that, the control panel is hooked up. Hooking up the USB power ports from the computer and then the Ethernet cables from the coin chutes to the back.
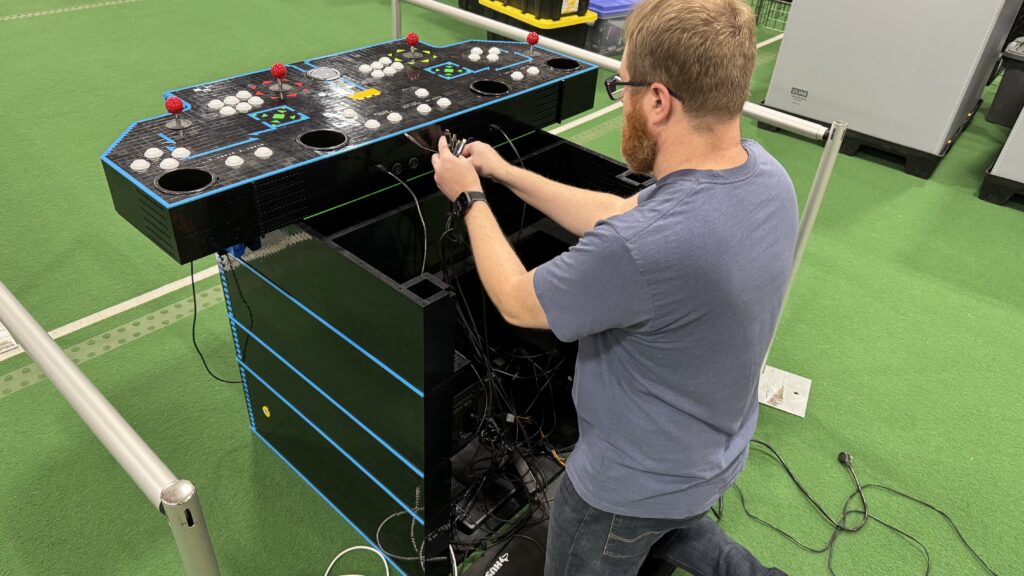
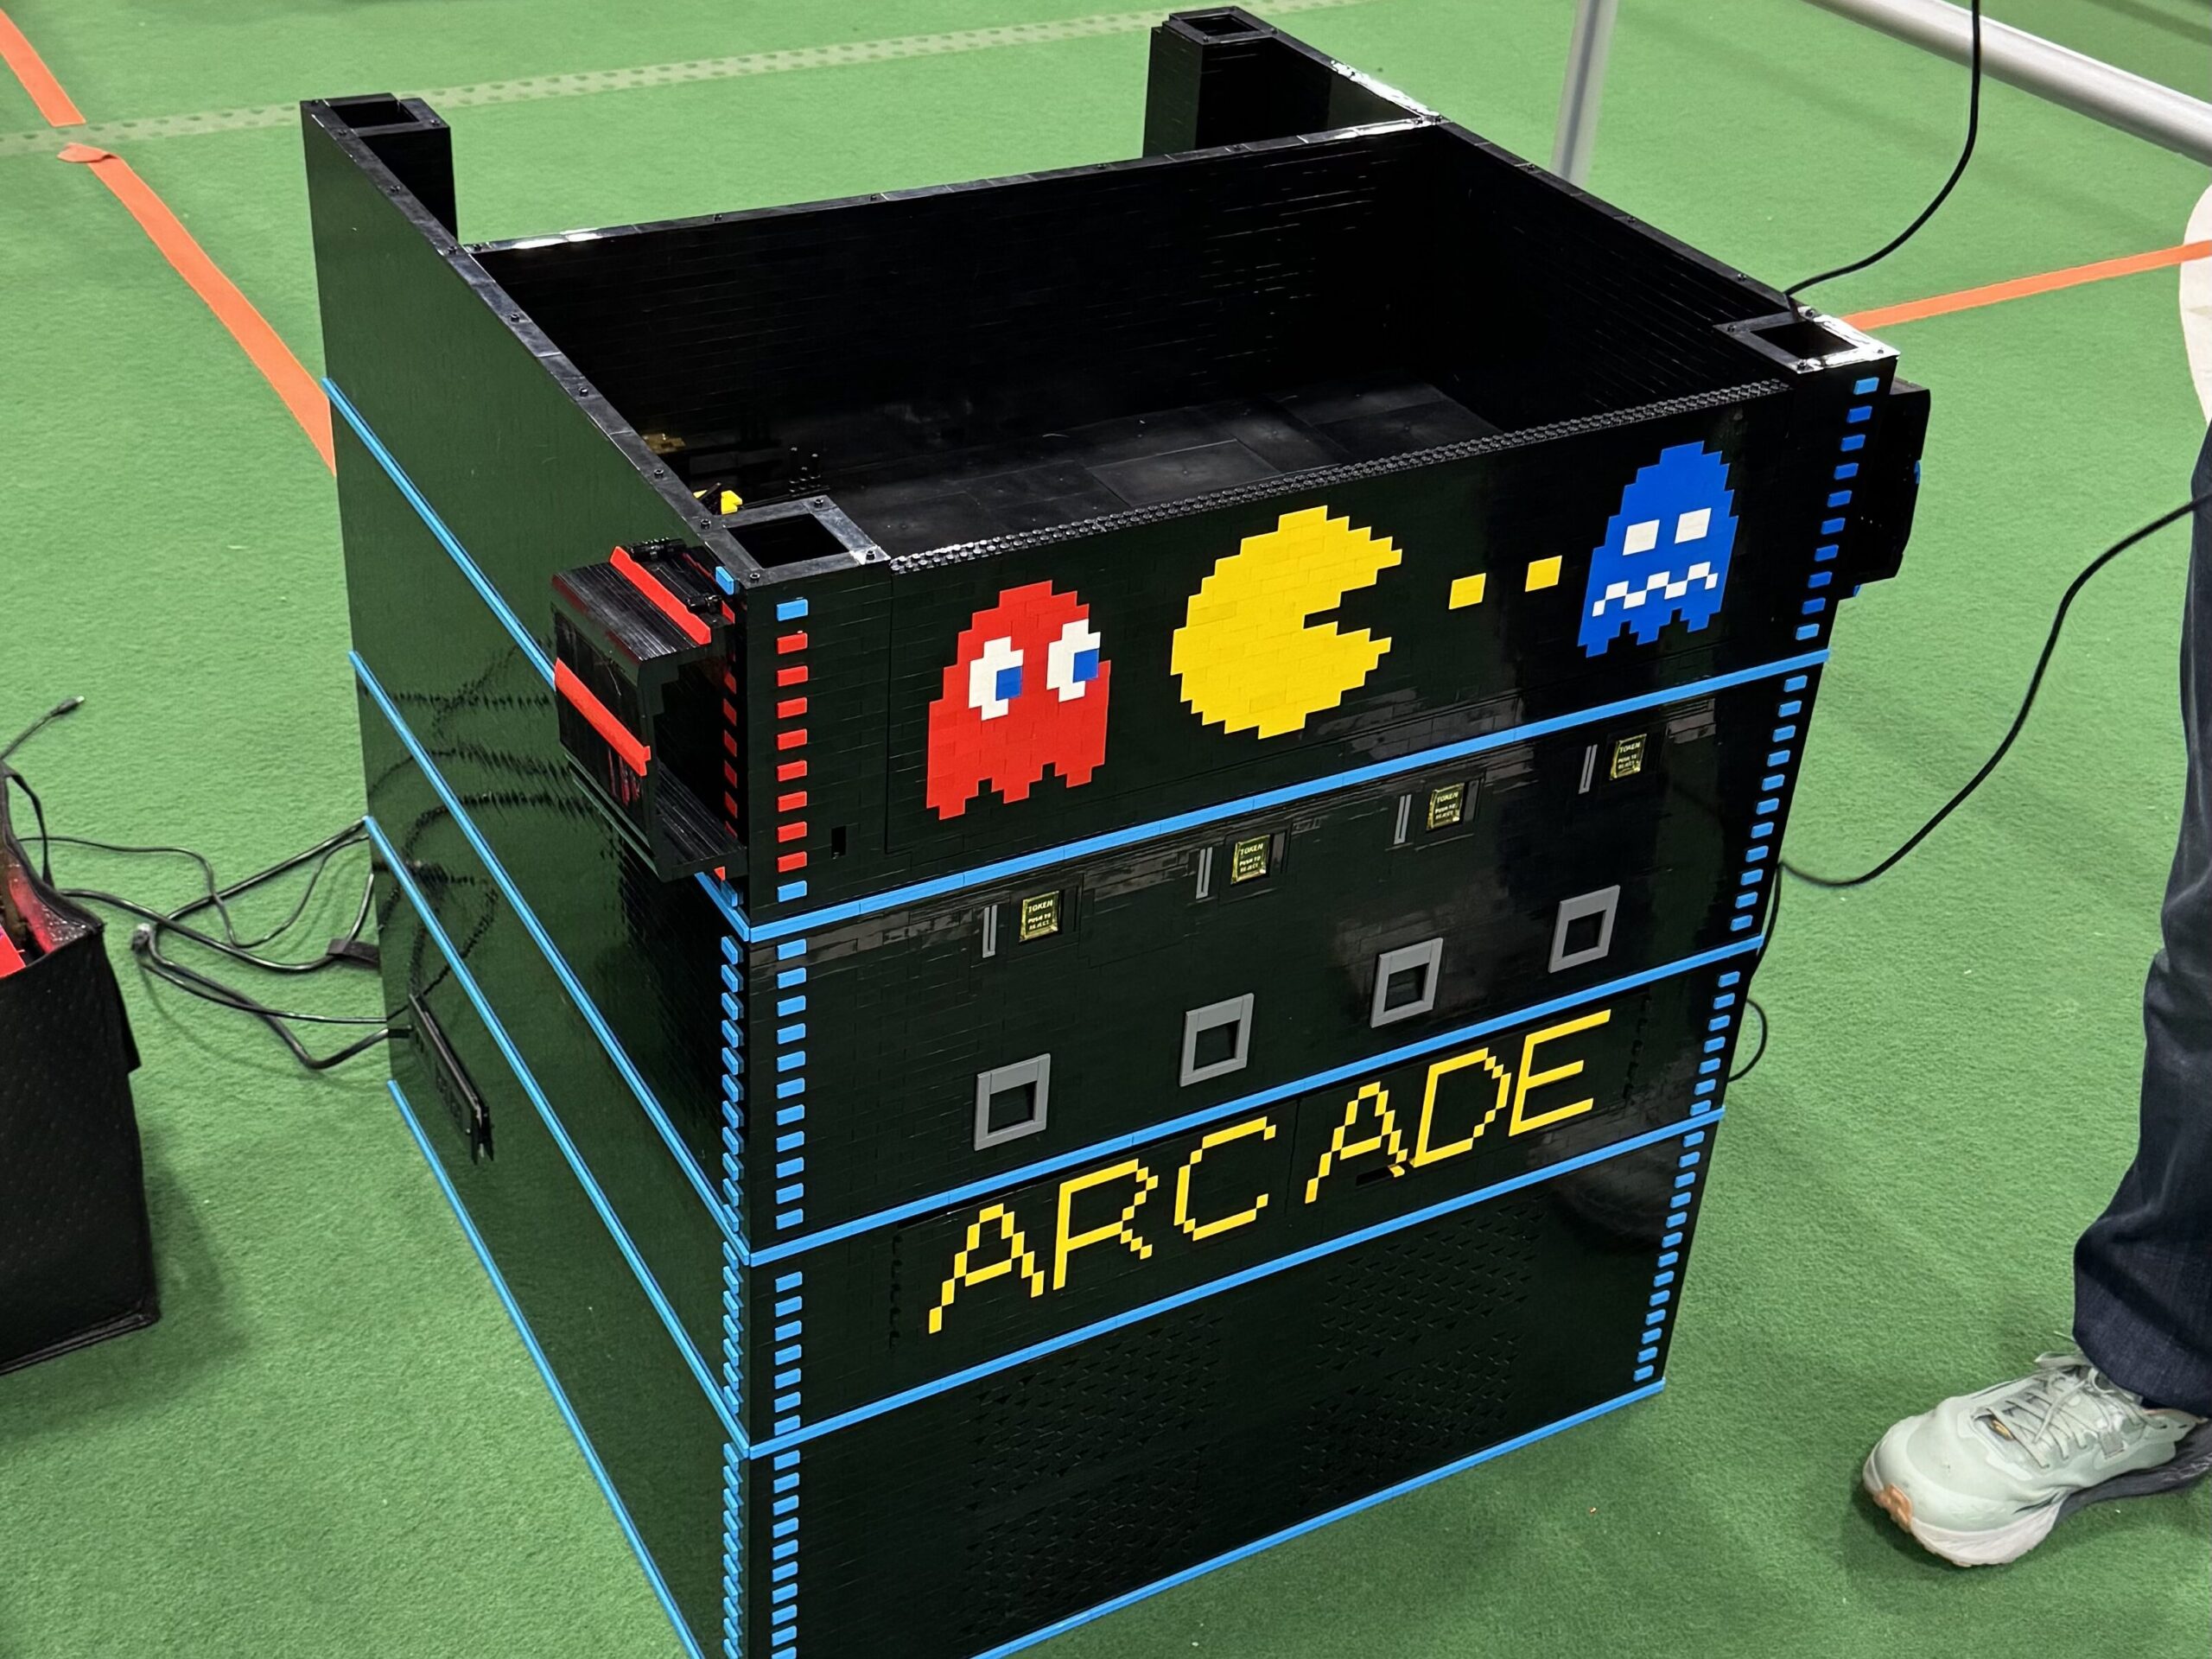
Then the display is added.

Finally, at the very top of it all, the marquee!
Hooking it up and placing the final touches on top, including actual game-based LEGO sets such as:
- Nintendo Entertainment System™ #71374
- Atari® 2600 #10306
- Arcade Machine #40805
As well as a QR code directing users who scan it to this very website https://thebrickade.com/.
And now, it’s time for the show!
The First Show
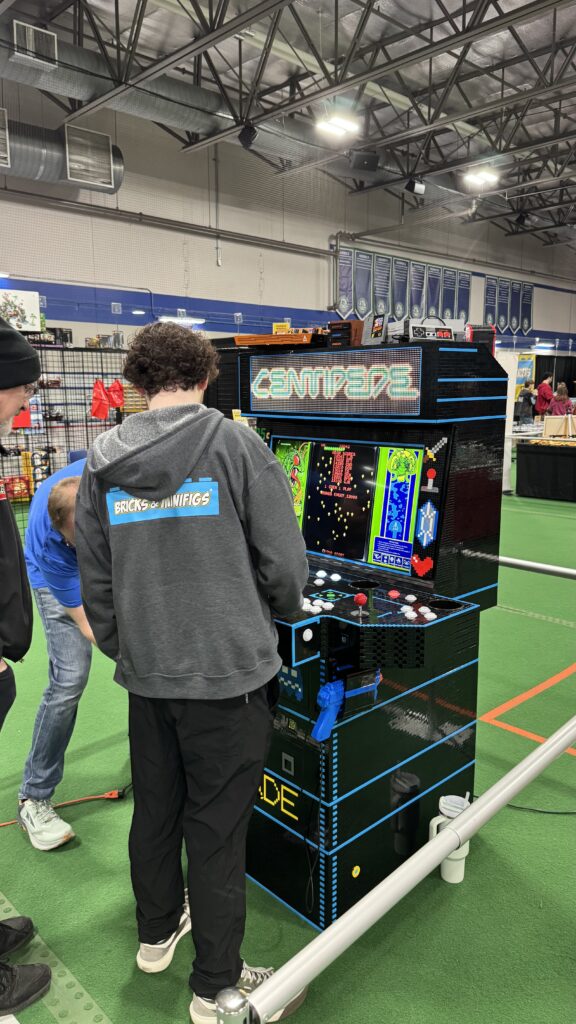
It was very rewarding to see everyone’s reactions!
Interestingly, a lot of people either thought it wasn’t made out of LEGO® brick at all, or that it wasn’t actually functional. However, once they realized that it was not only mostly LEGO brick, but that it was functional as well, they were blown away.

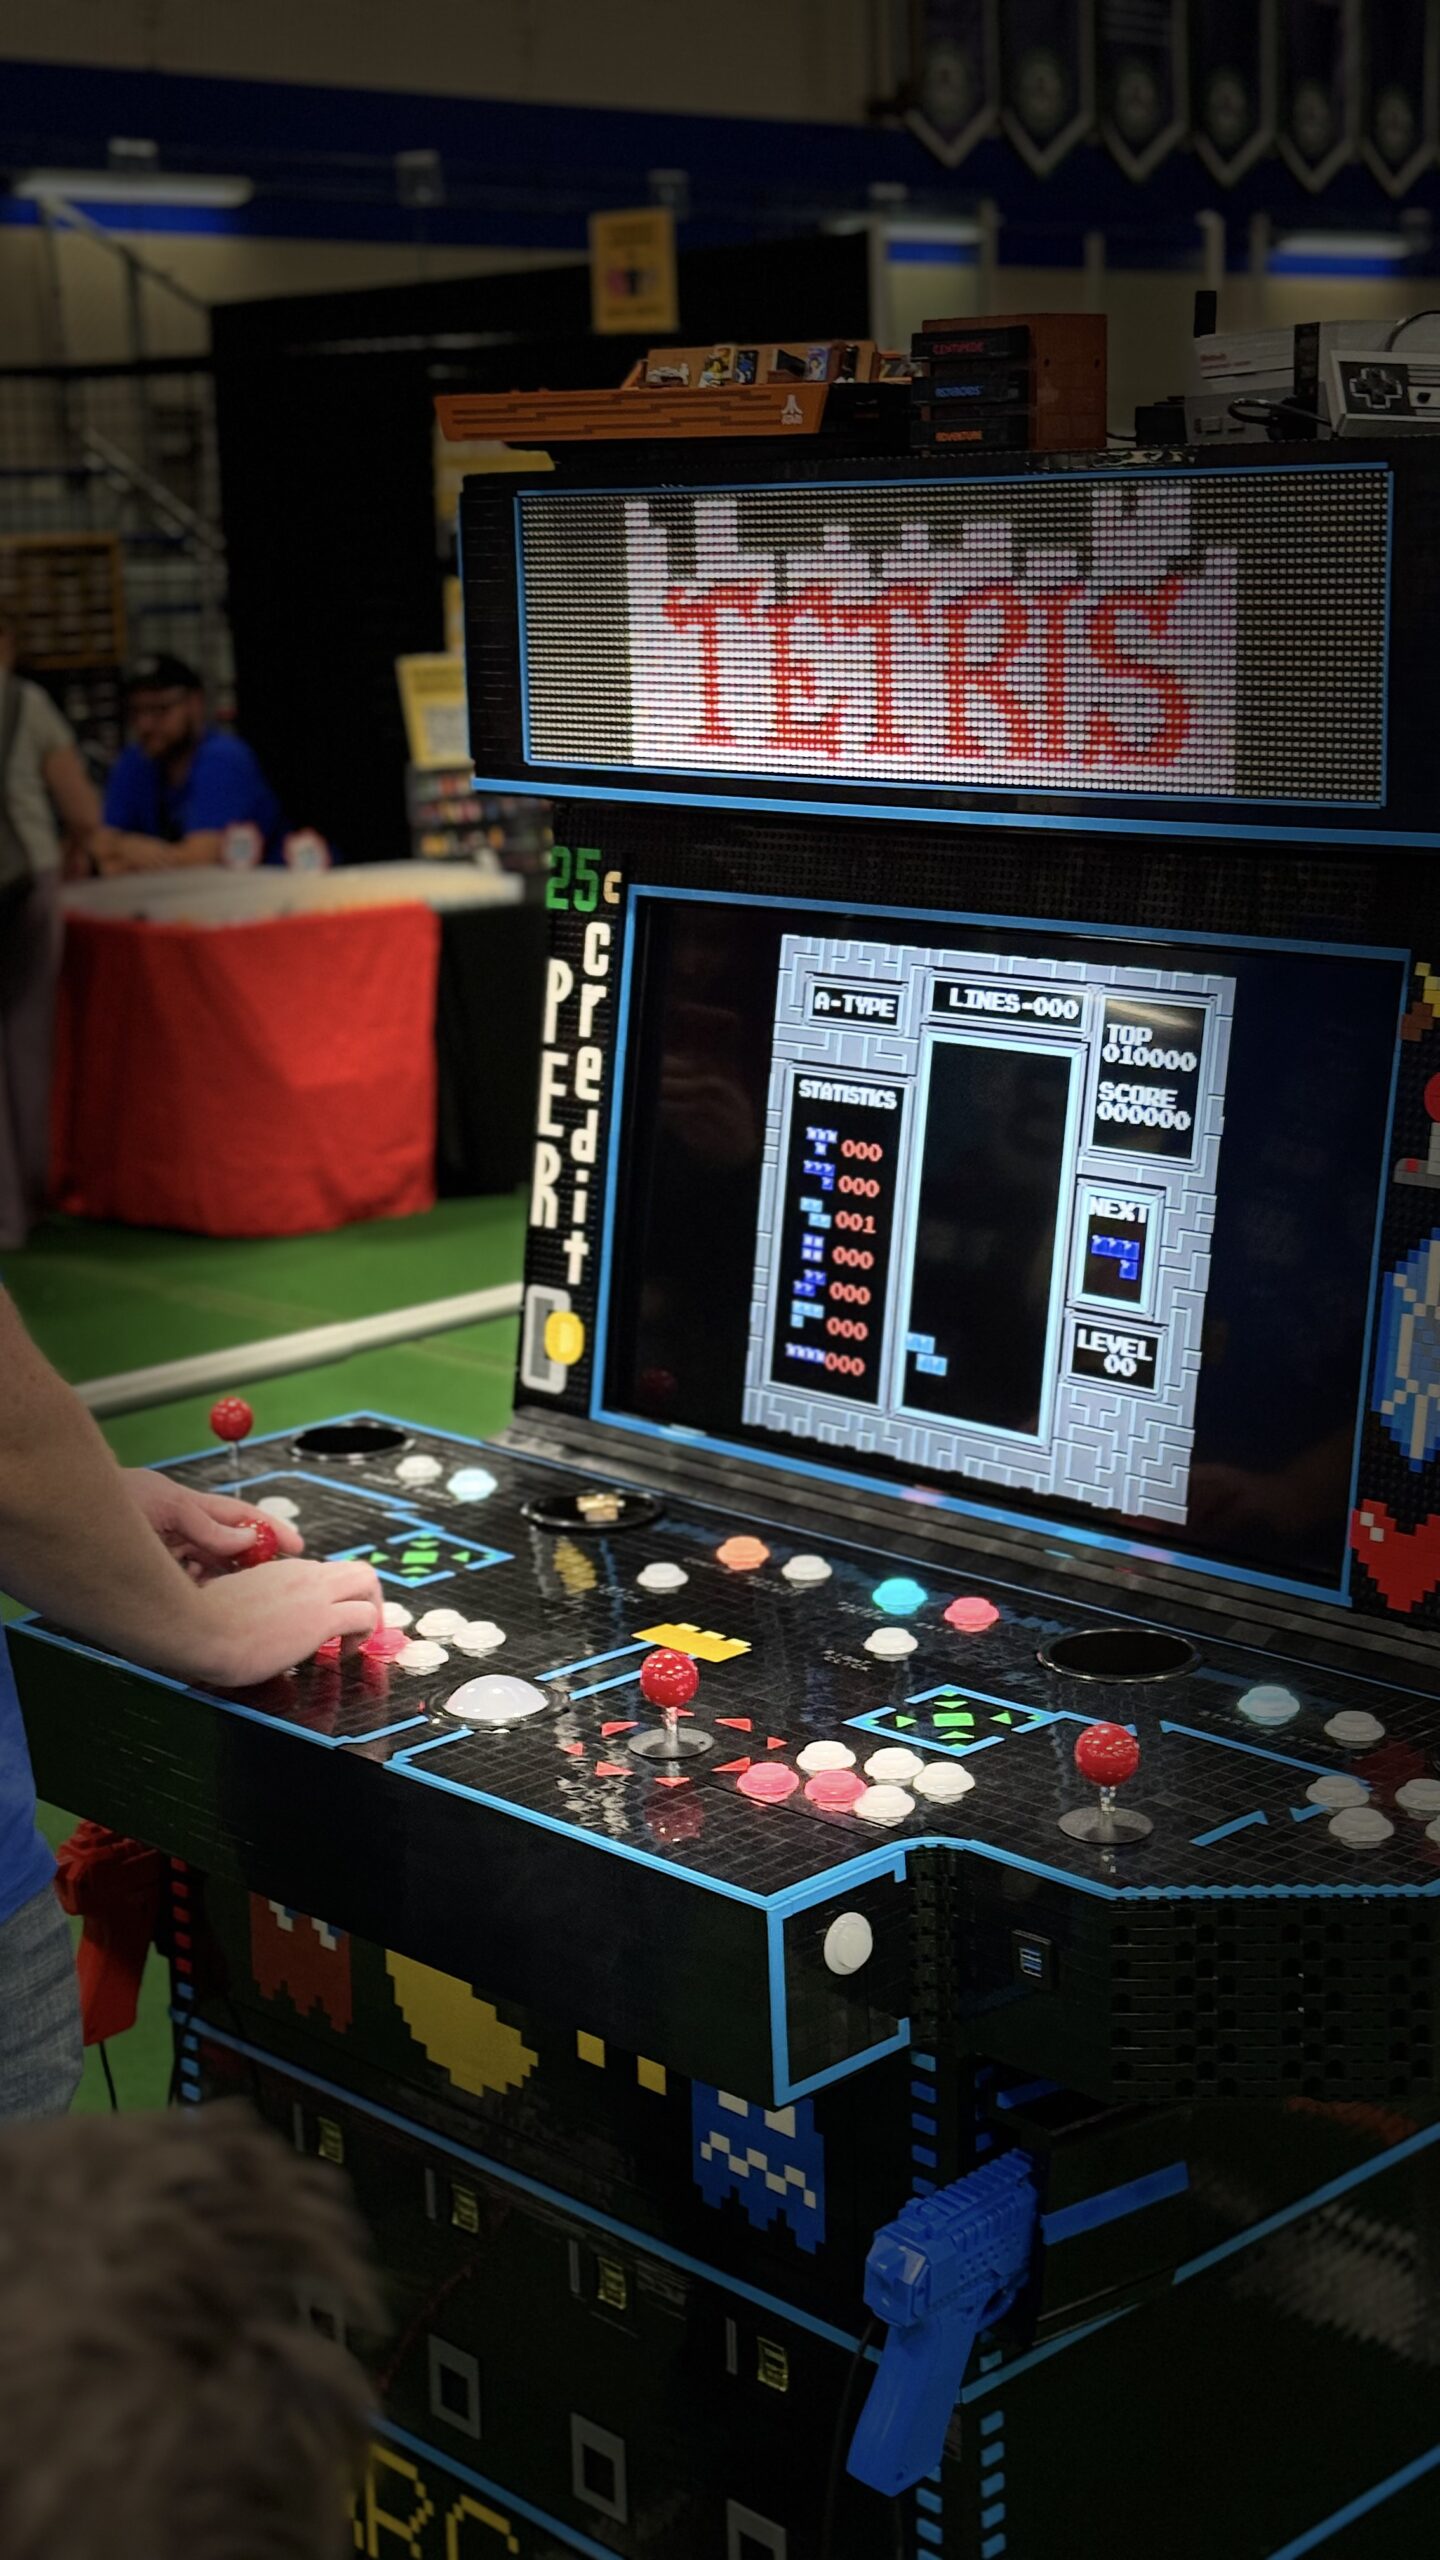
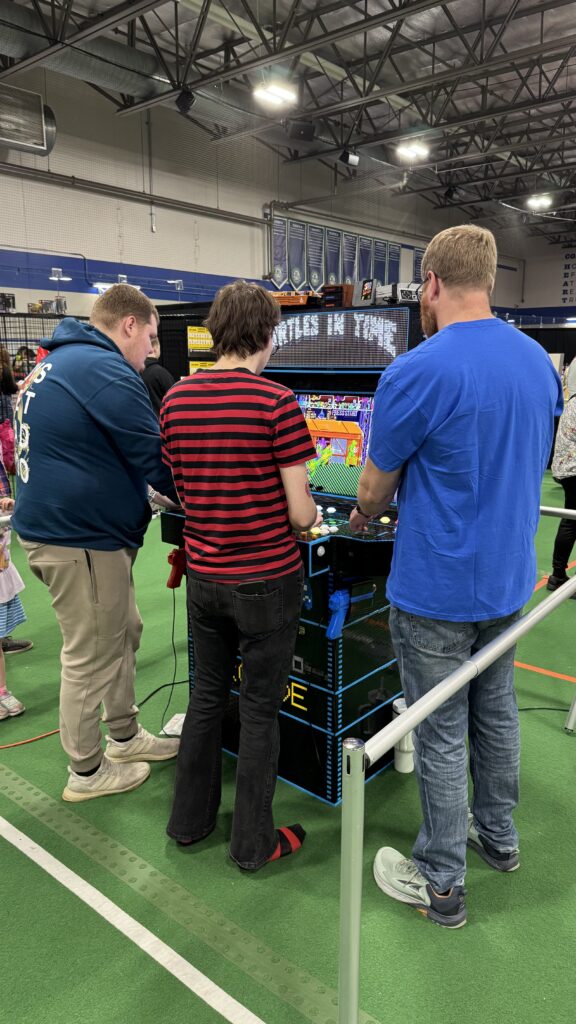
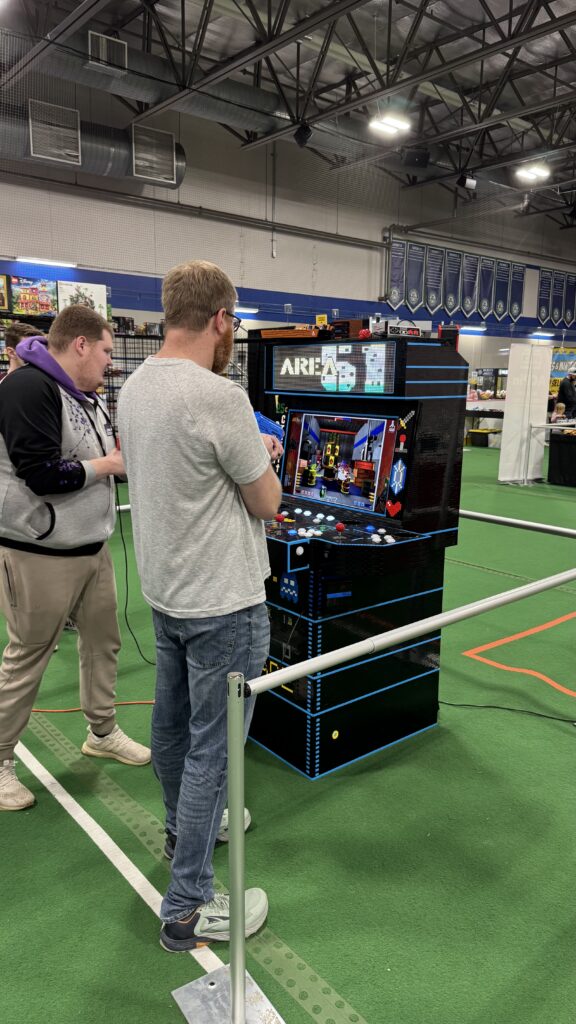
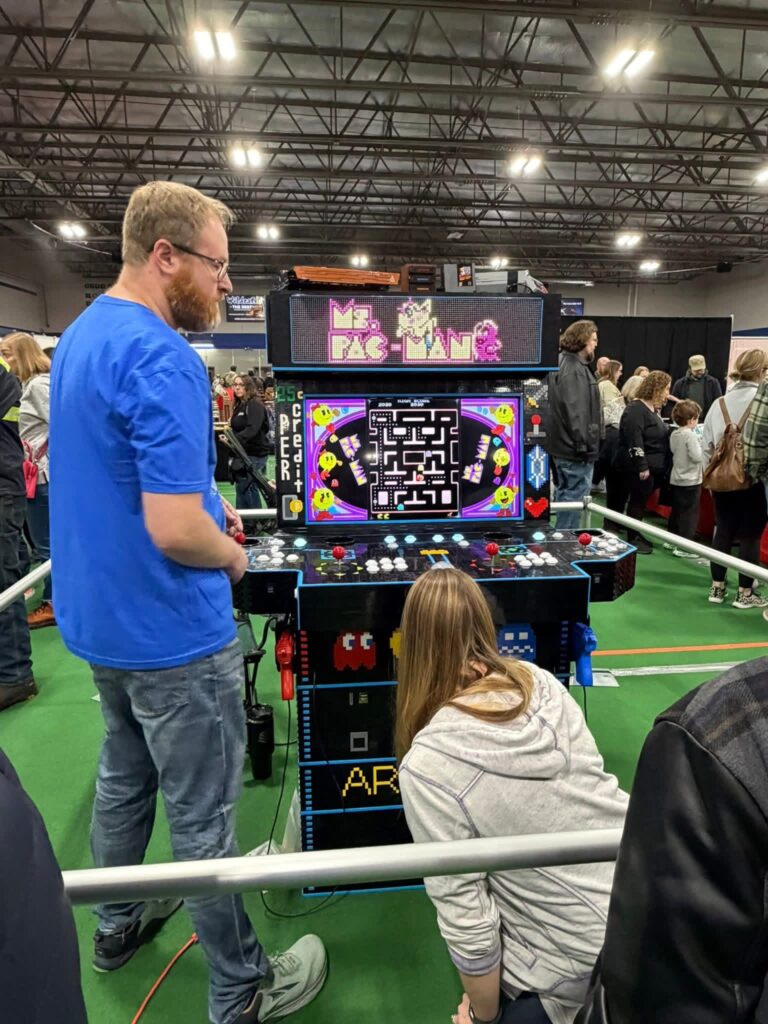
Throughout the day, my wife and I talked to folks of all ages and demonstrated various games that included use of the joysticks or the light guns. We demonstrated the coin chutes and the coin returns and even the coin storage bin.
Sadly, we were able to really let many play the arcade, because we weren’t sure how we’d be able to control the line to make it fair for everyone in attendance.
Although, in the end, everything really worked out perfectly and the arcade did get to be used and played on all weekend during the show! Not just by my wife or myself demonstrating it, but also by a lucky few who were at the show who got an opportunity to play their favorite games on it for a short time!
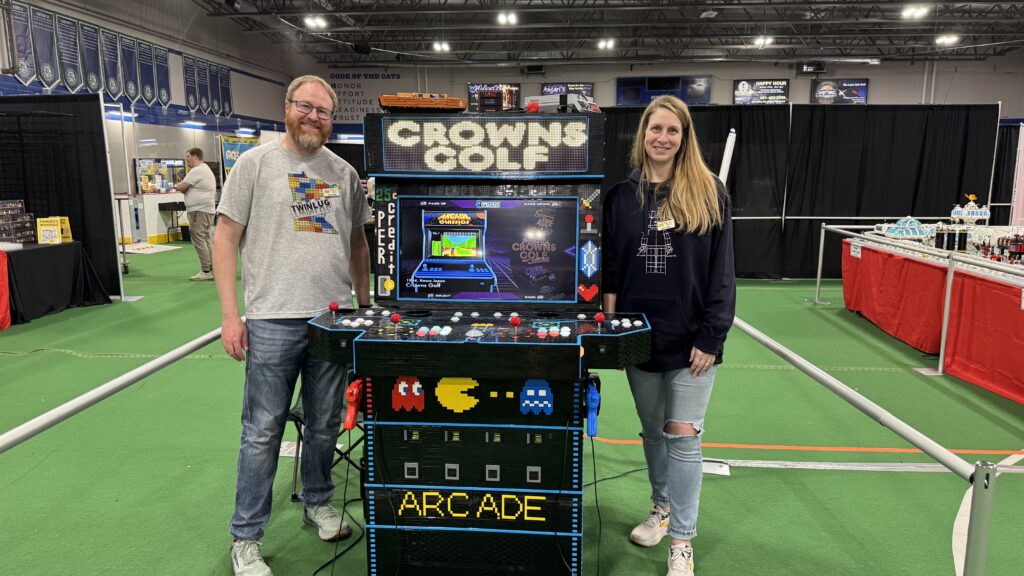
Here are some more photos from the show.
Loading Up the Arcade – Now for the Main Event
At the end of the day on Sunday, we tore down the arcade, and brought it back home. We had list of things to improve on.
First, we were going to make a sign that says, “100% LEGO brick, 100% functional”. And next, we want to add a little miniature, minifig-sized, arcade room in the back of the arcade.
We discovered that, to my surprise, a lot of people wanted to see the back of it the cabinet. I personally think it’s boring, but others were extremely interested. So we’ll add some fun touches back there for people.
I also started an Instagram account for this, you can check it out at: https://www.instagram.com/thebrickade
We’ll also be working on a few other modifications and such to the arcade in preparation for the big showing of it at BrickWorld in Chicago this June 20th and June 21.
If you want to come and see it in person, here’s where you can find information and tickets for the show: https://brickworld.com/chicago/.
If you’re in the area, come on by and see if for yourself!